Importing Students from a file into QuickTrack Pro for schools
Below you will find a tutorial teaching you how to Import a CSV file into QuickTrack Pro for schoolsThe QuickTrack library software can import and lookup students from a CSV file exported or
made elsewhere, for example in the SIMS system or from a simple spreadsheet.
Click on the Import popup menu at the top of the main screen.
made elsewhere, for example in the SIMS system or from a simple spreadsheet.
Click on the Import popup menu at the top of the main screen.

Select Import Data from the Import menu.

Click Select File to choose a CSV file to import.
Choose your CSV file from the dialog that pops up and click Open.

Select Students from the Import Into popup menu.
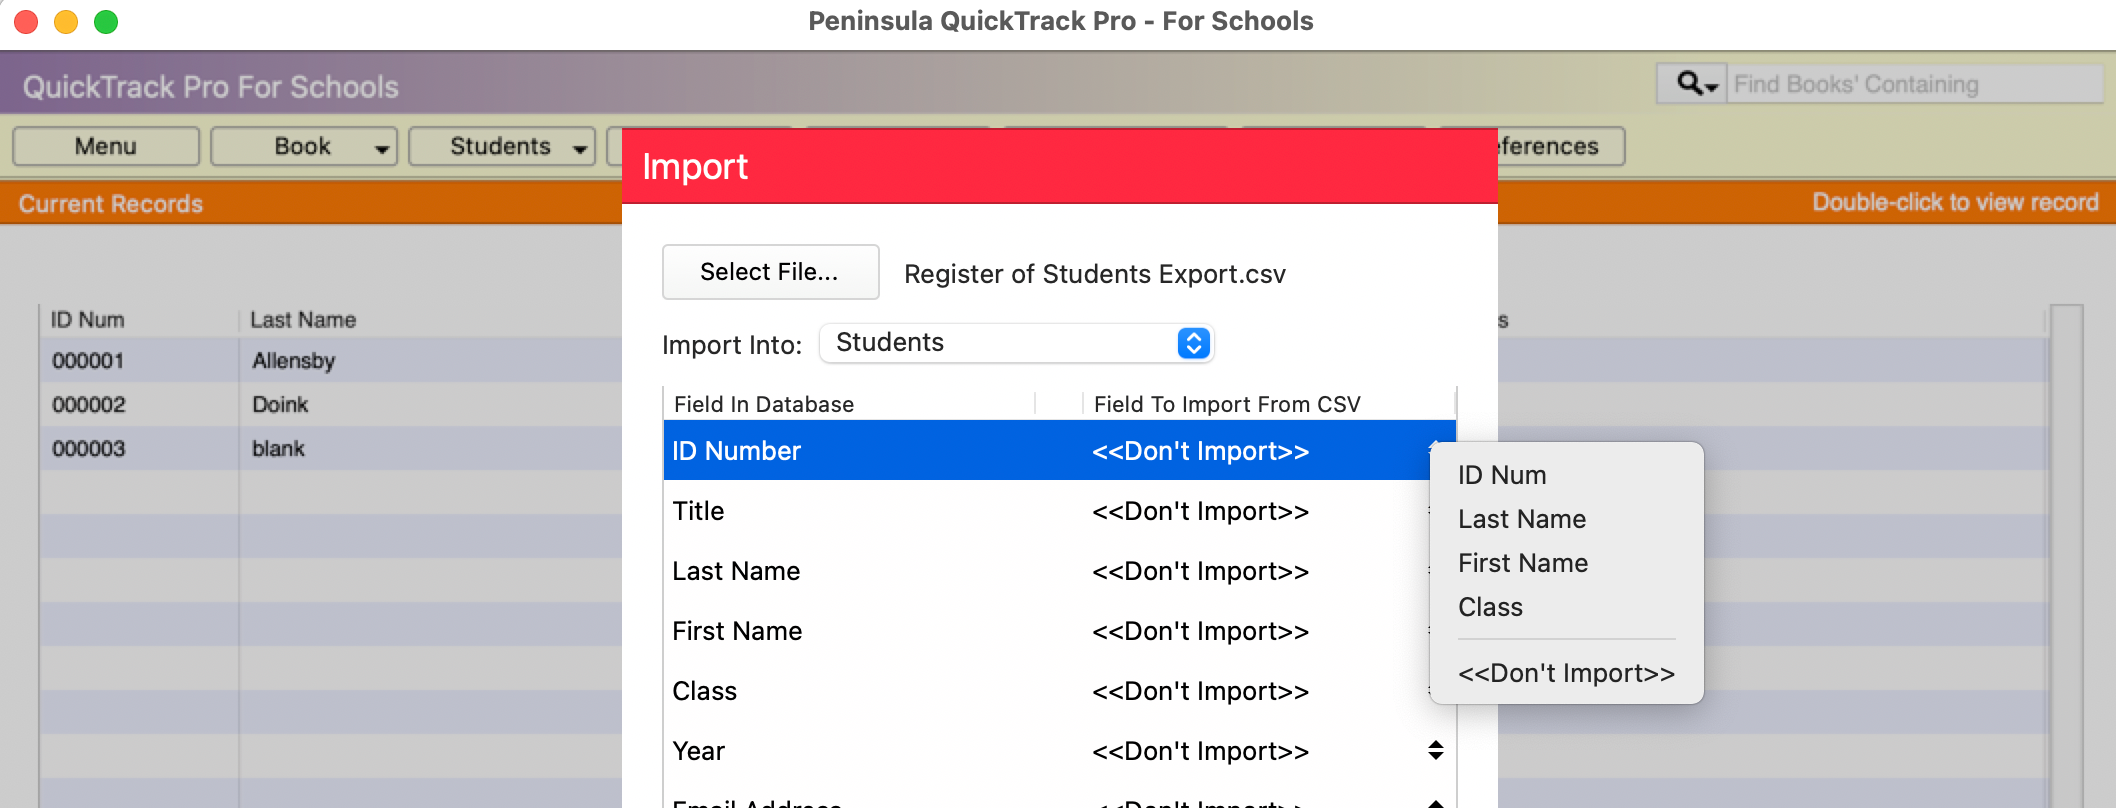
The fields in the library software are on the left, on the right of each field is a drop down list of all the fields in the
CSV file, so you can choose which fields you want to match. Initially they all say Don't Import.

Select Don't Import to the right of a field that you would like to match with a field in your file.
All the fields in your import file will appear in a drop down list. Select the one you
want to match for each field in the database.
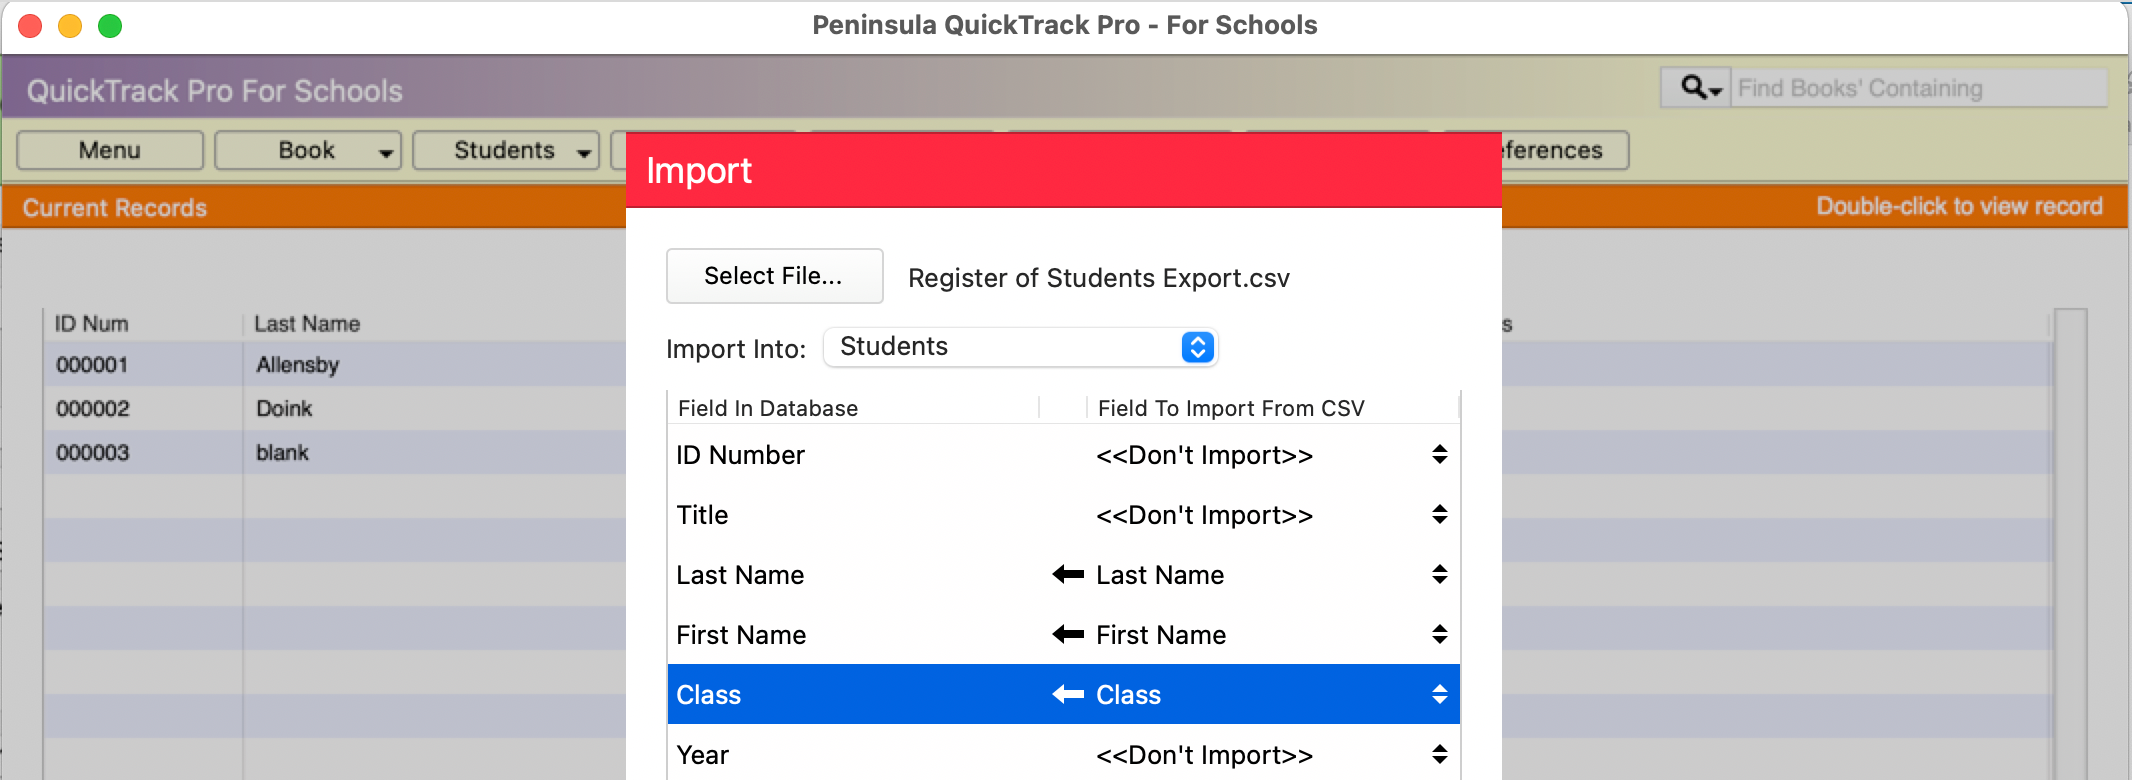
Leave any fields you don't have a match for as Don't Import.

Here we have chosen First Name, Last Name and Class. In this example our field titles match those
of the database, but you can match any appropriate field, whatever it's title.
Please Note: If your year groups are named differently this can be adjusted in the software.
If you do not want a field filled, or do not have a matching field, just leave it as << Don't Import >>.

When you have finished matching your fields you are ready to import the file.
If your CSV file has a line with the field names in, click the Skip First Line checkbox at the bottom of
the window, otherwise the headings will be imported as a student record.
Click the Import button to import add your student records to the database.

