

Printing Amazon FBA Item Labels
Below you will find a tutorial teaching you how to set up the driver to print Amazon FBA Item labels.1. Printer Setup
a)

b)
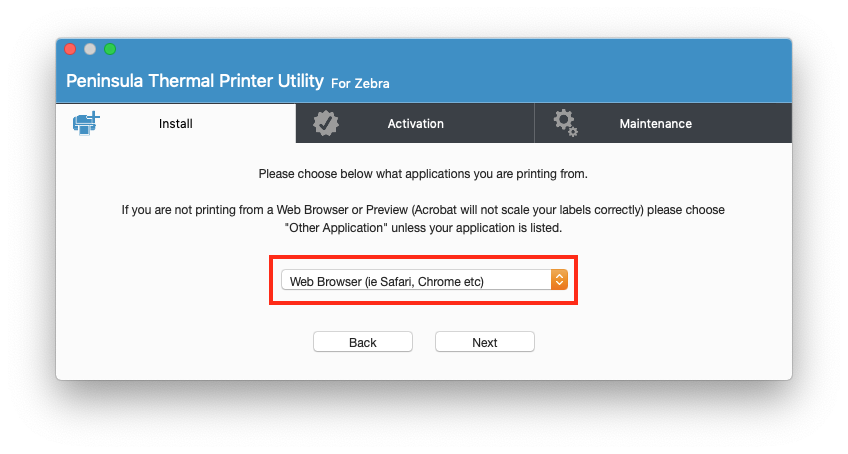 Select "Web Browser (ie Safari, Chrome etc)" from the popup menu and click the Next button.
Select "Web Browser (ie Safari, Chrome etc)" from the popup menu and click the Next button.
c)
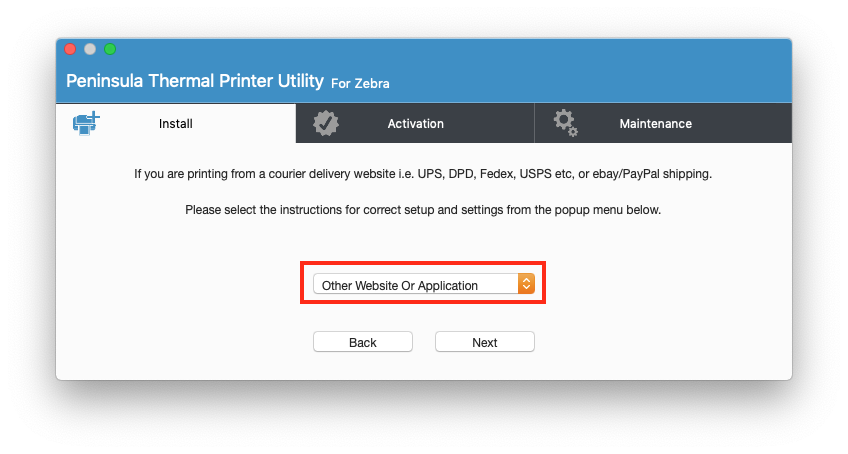 Select "Other Website or Application" from the popup menu and click the Next button.
Select "Other Website or Application" from the popup menu and click the Next button.
d)
 Follow the instructions to generate a PDF of your label from the website.
Follow the instructions to generate a PDF of your label from the website.
e)
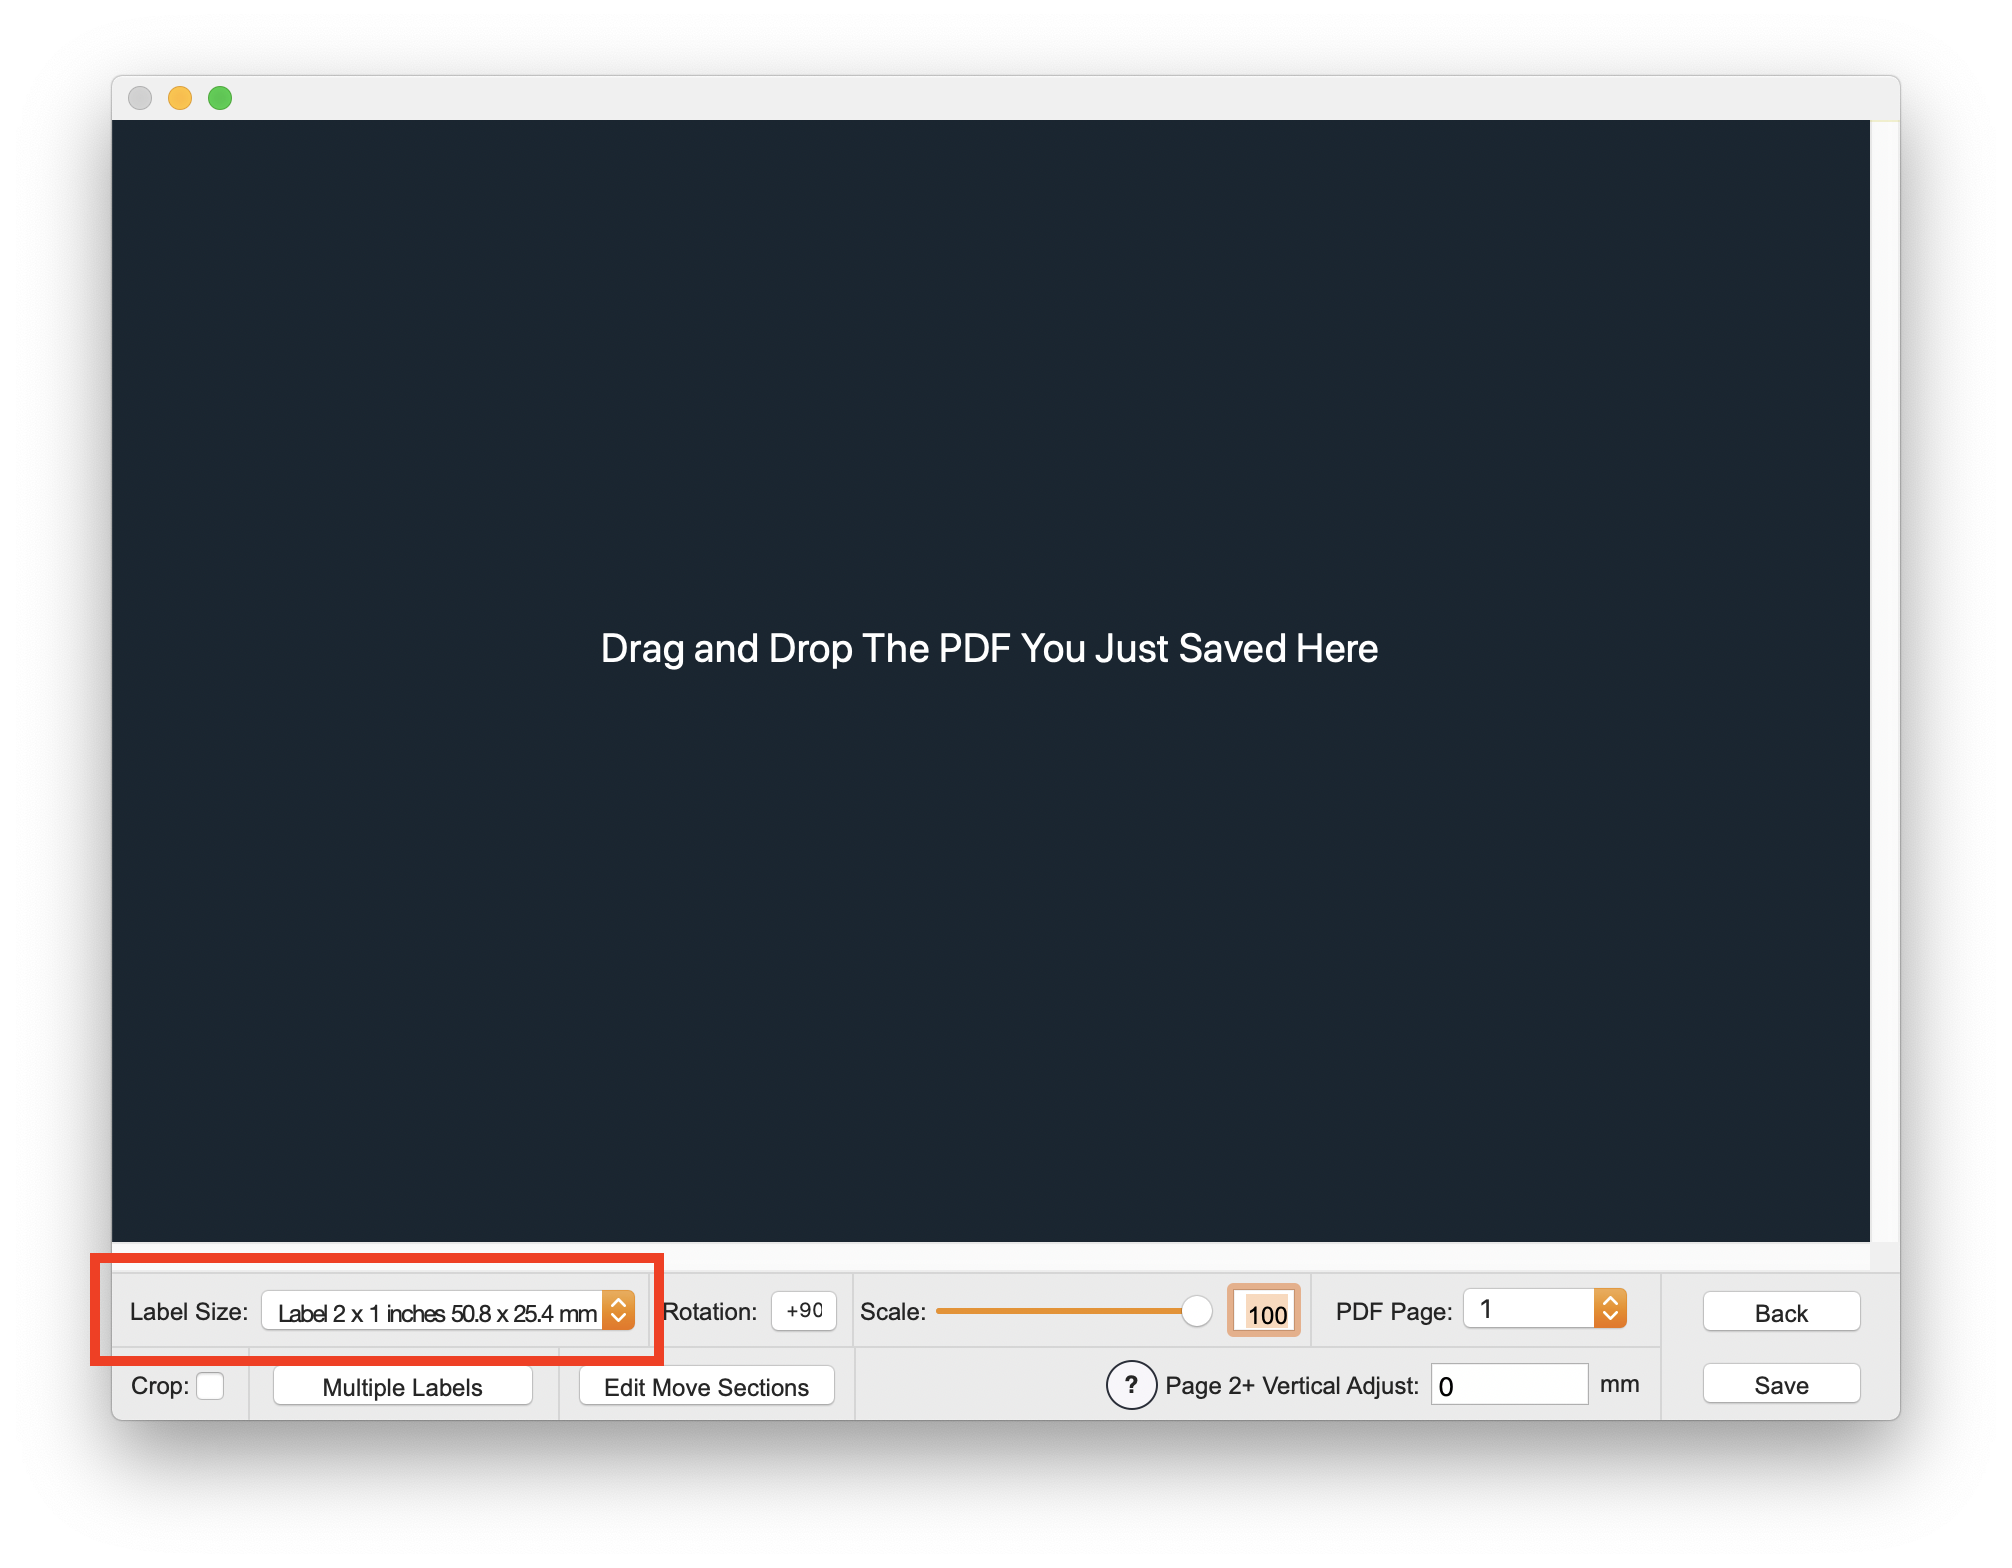 Select your label size from the Label Size popup and then drop the PDF generated in the previous step onto the window.
Select your label size from the Label Size popup and then drop the PDF generated in the previous step onto the window.
f)
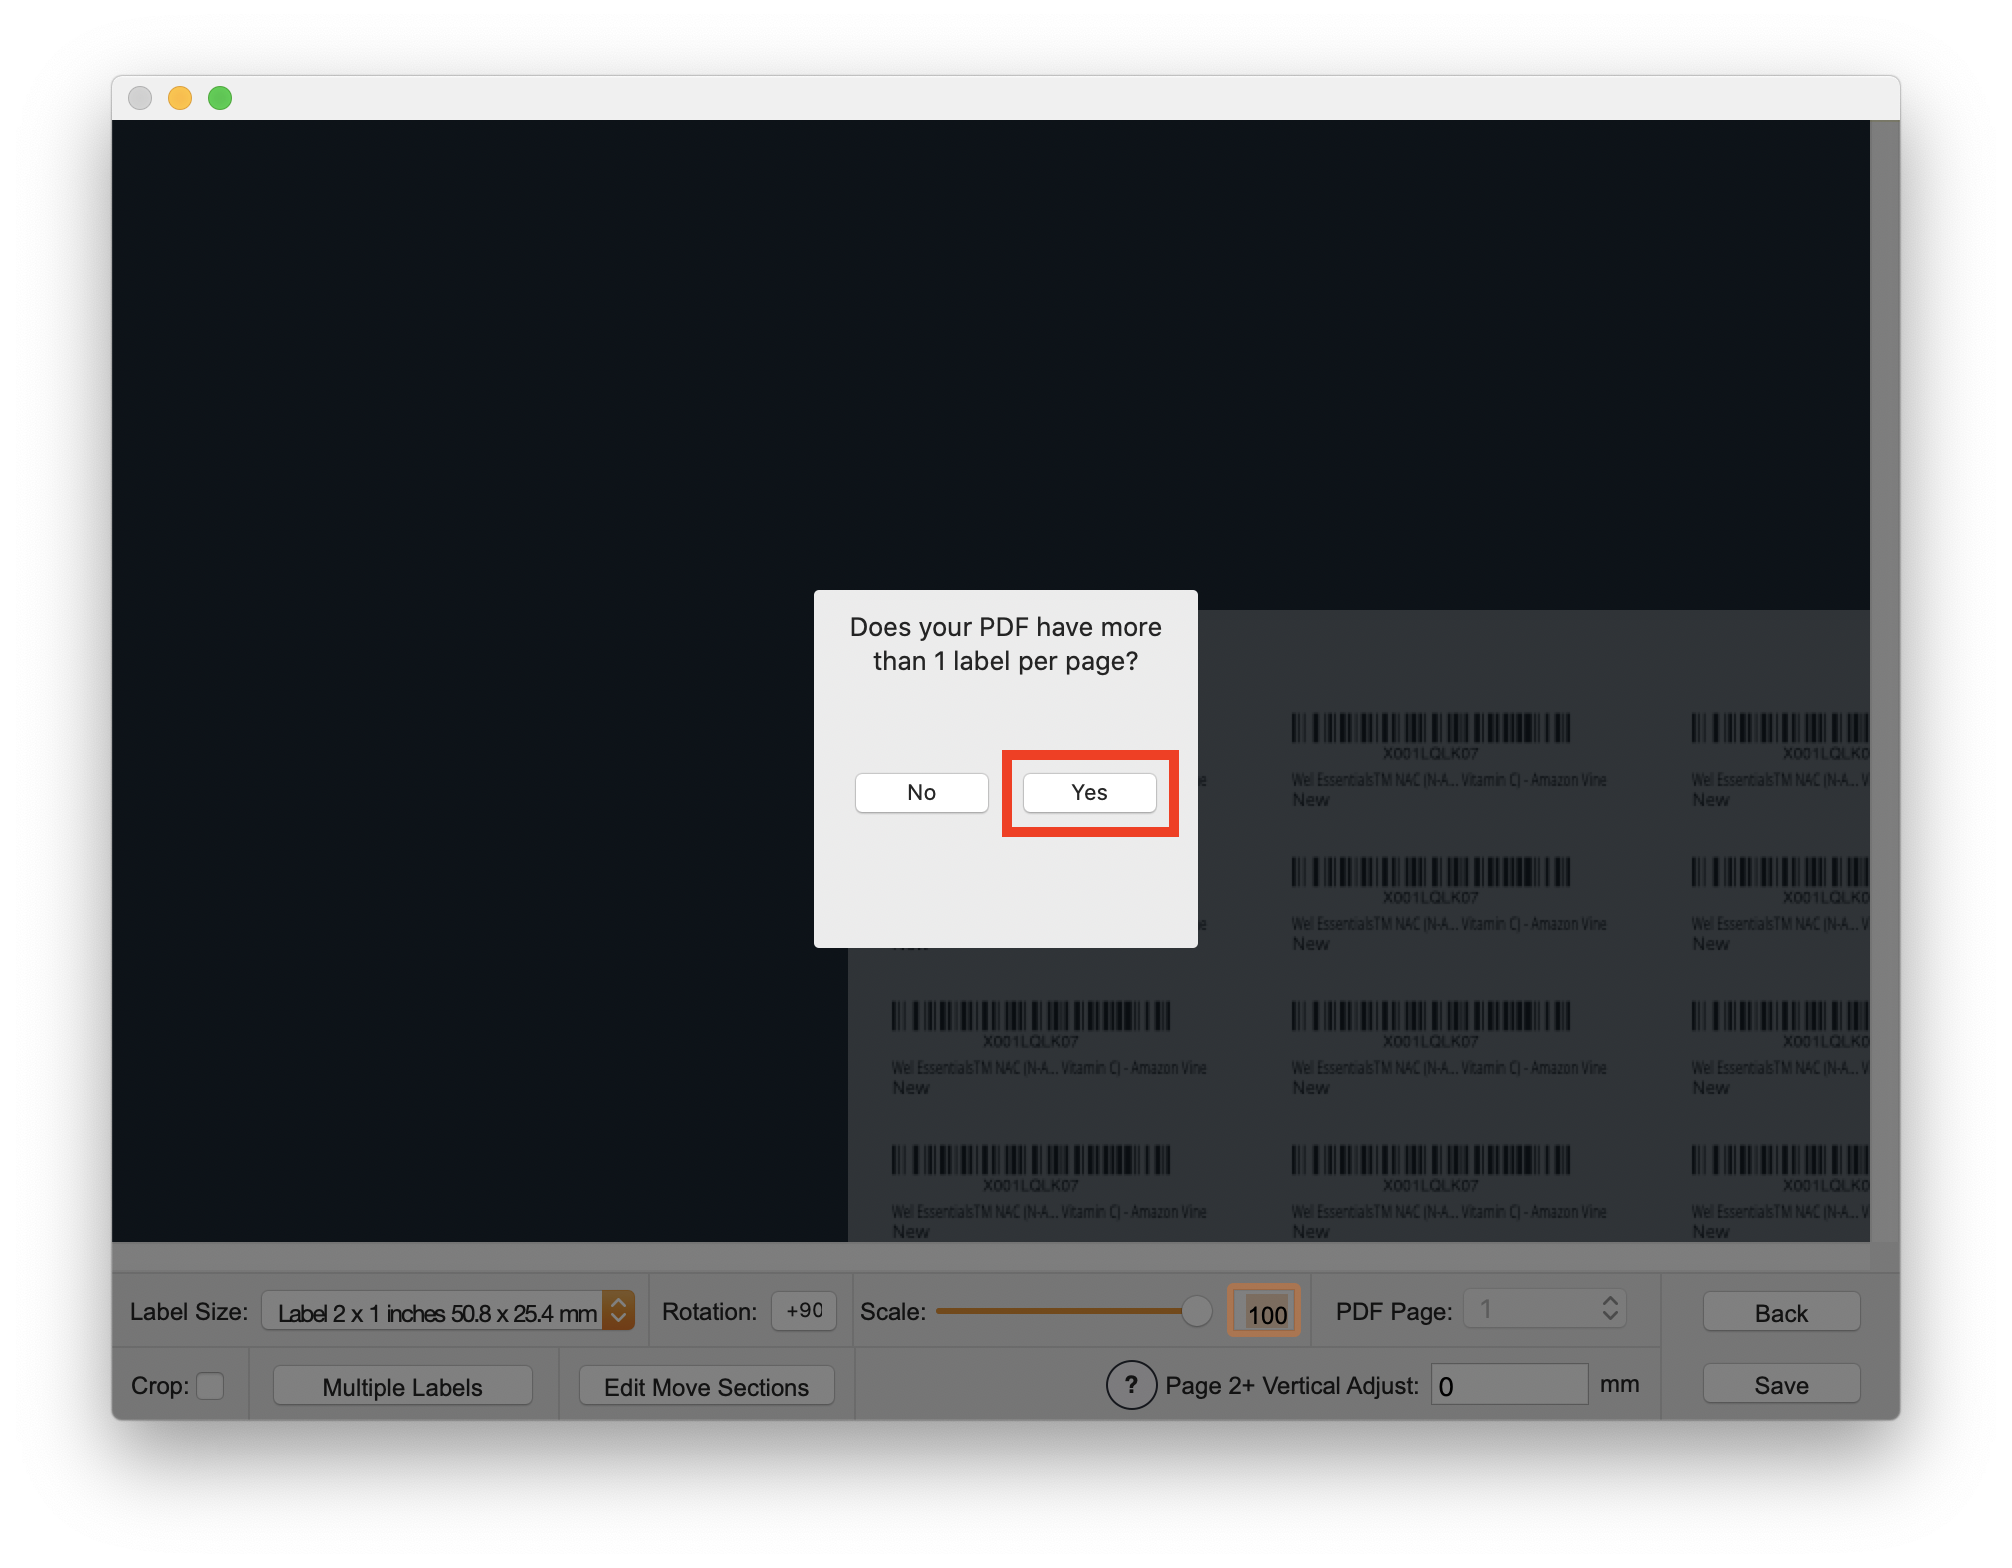 Choose "Yes" when asked if there is more than one label per page.
Choose "Yes" when asked if there is more than one label per page.
g)
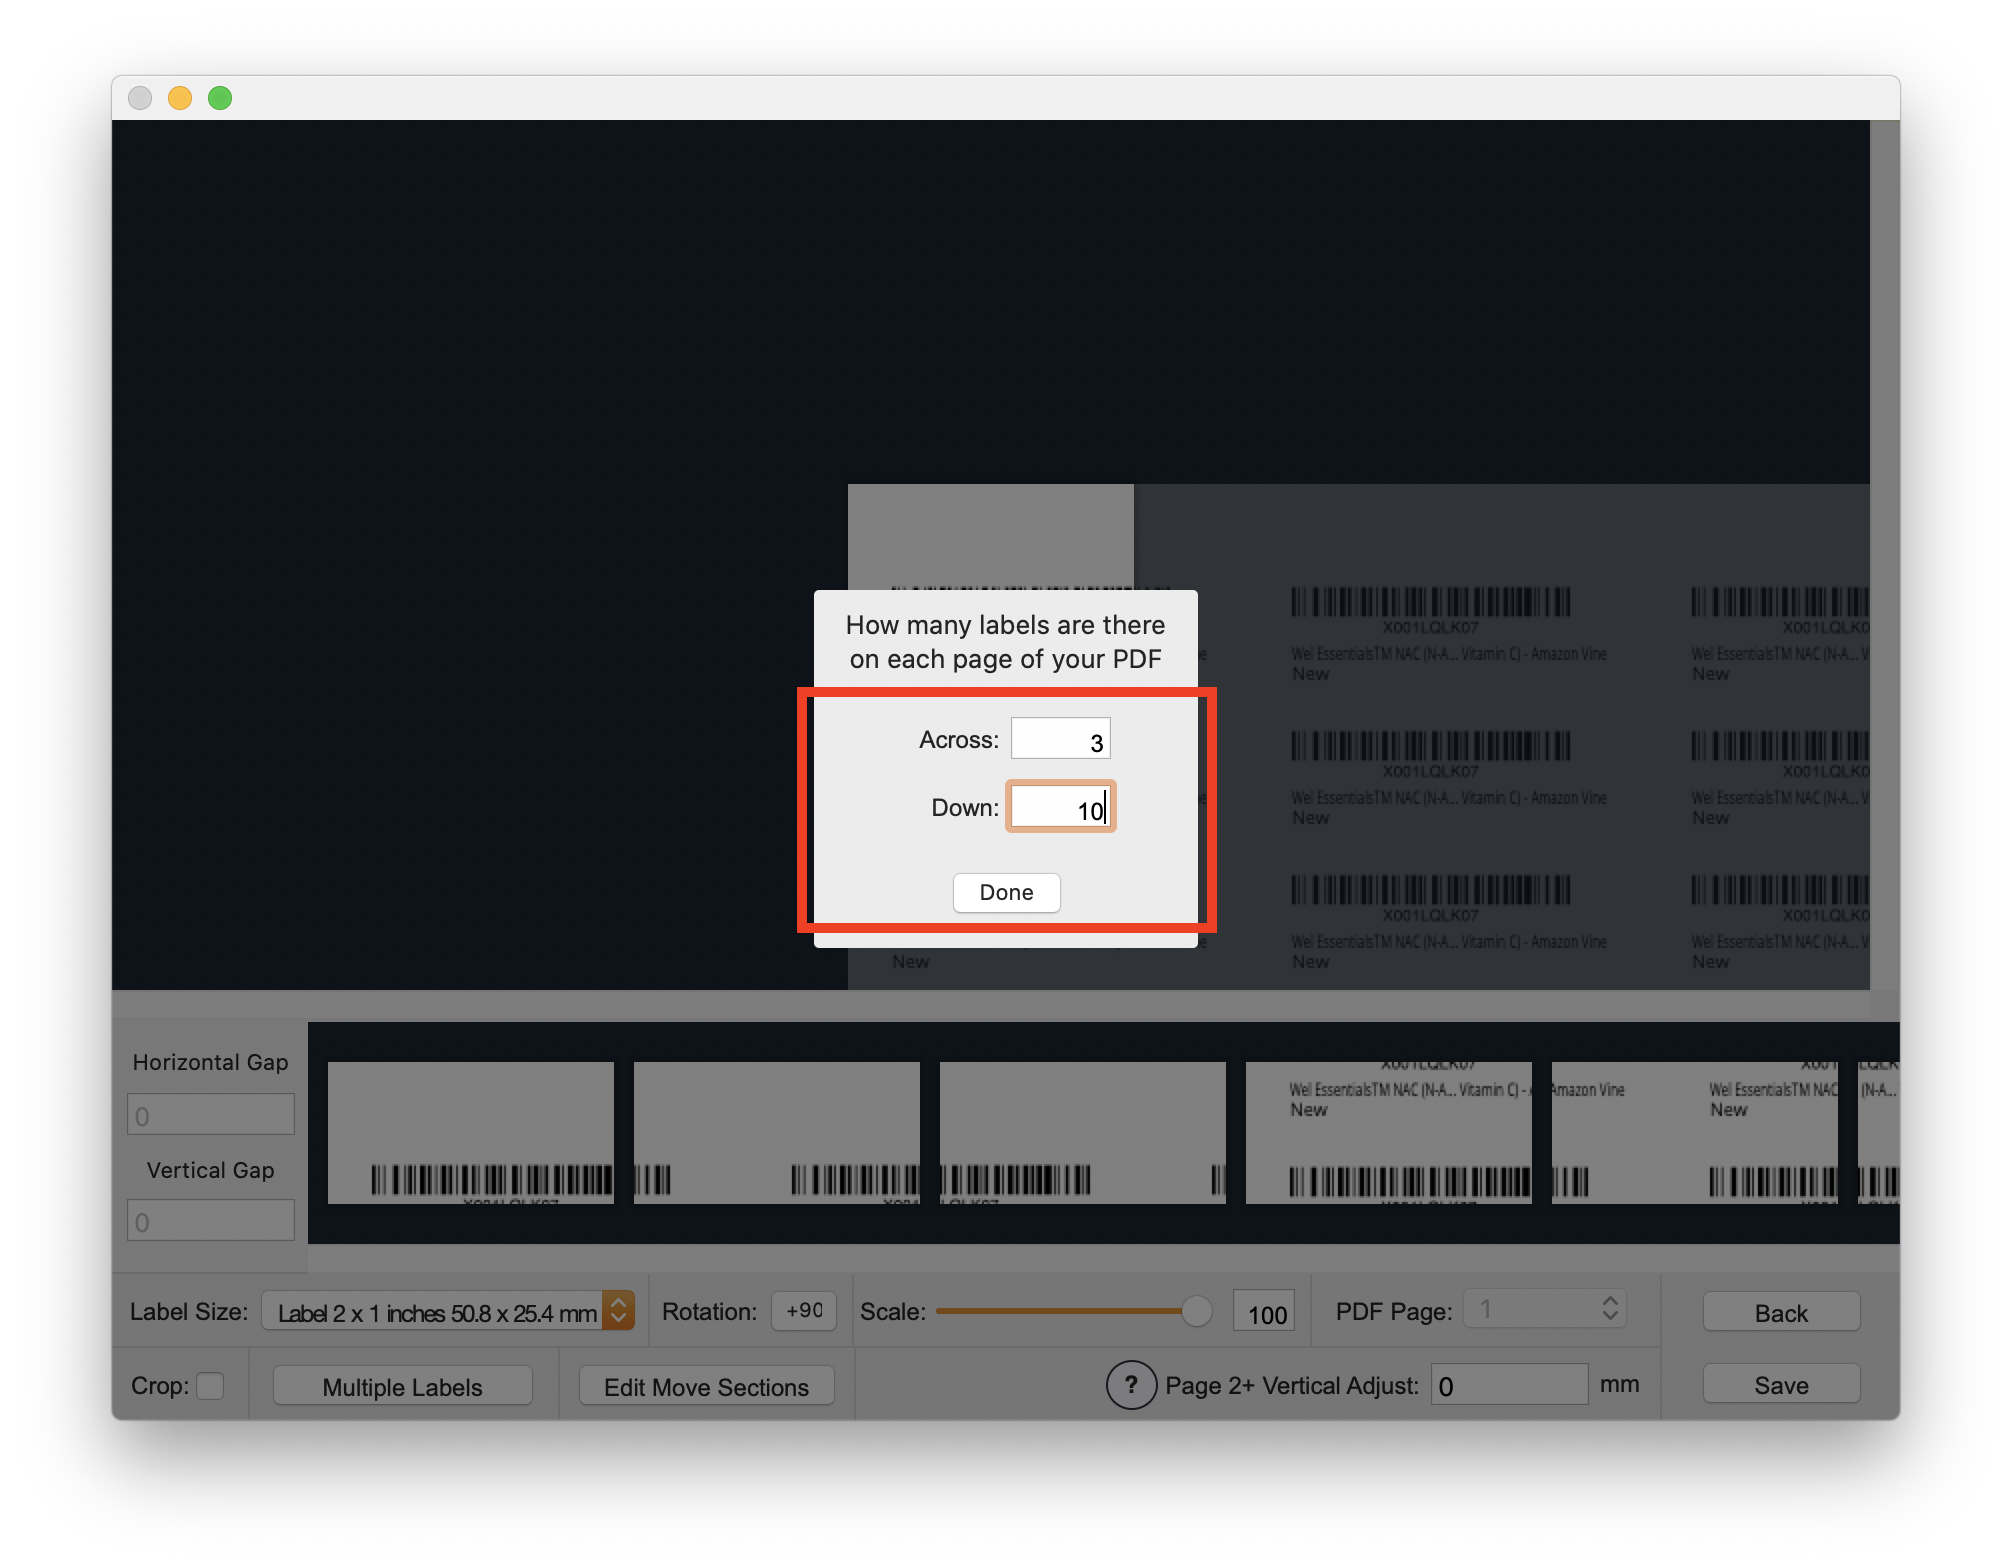 Enter 3 across and 10 down and click the "Done" button.
Enter 3 across and 10 down and click the "Done" button.
h)
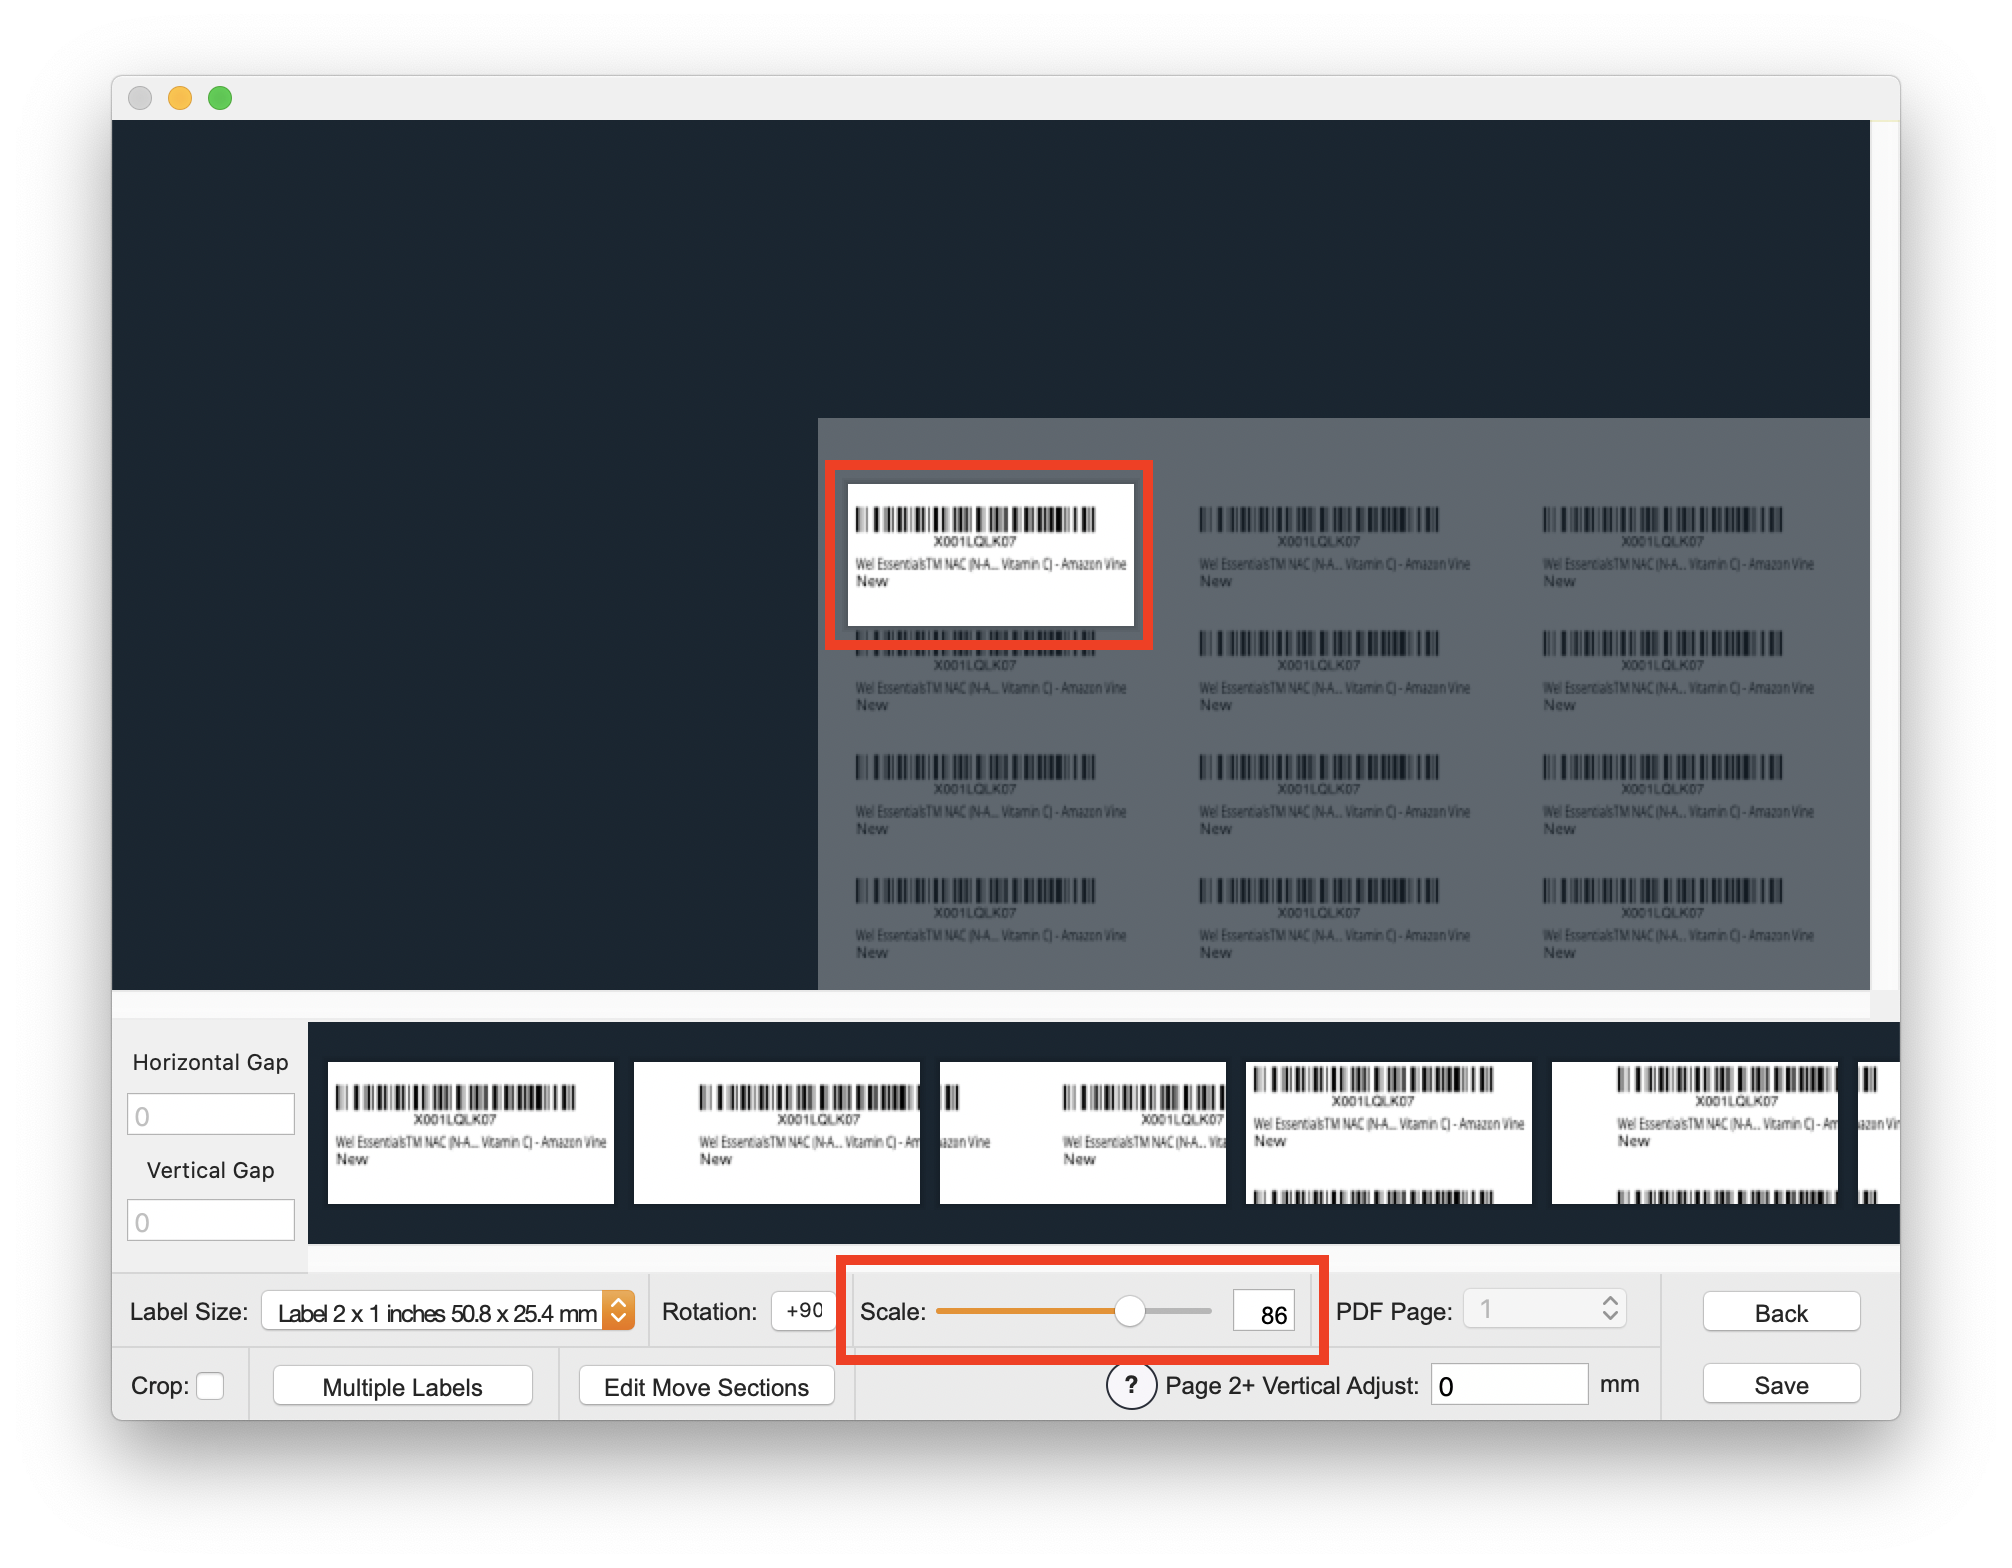 Drag the item label into position on the label and scale the page down to fit the label size.
Drag the item label into position on the label and scale the page down to fit the label size.
i)
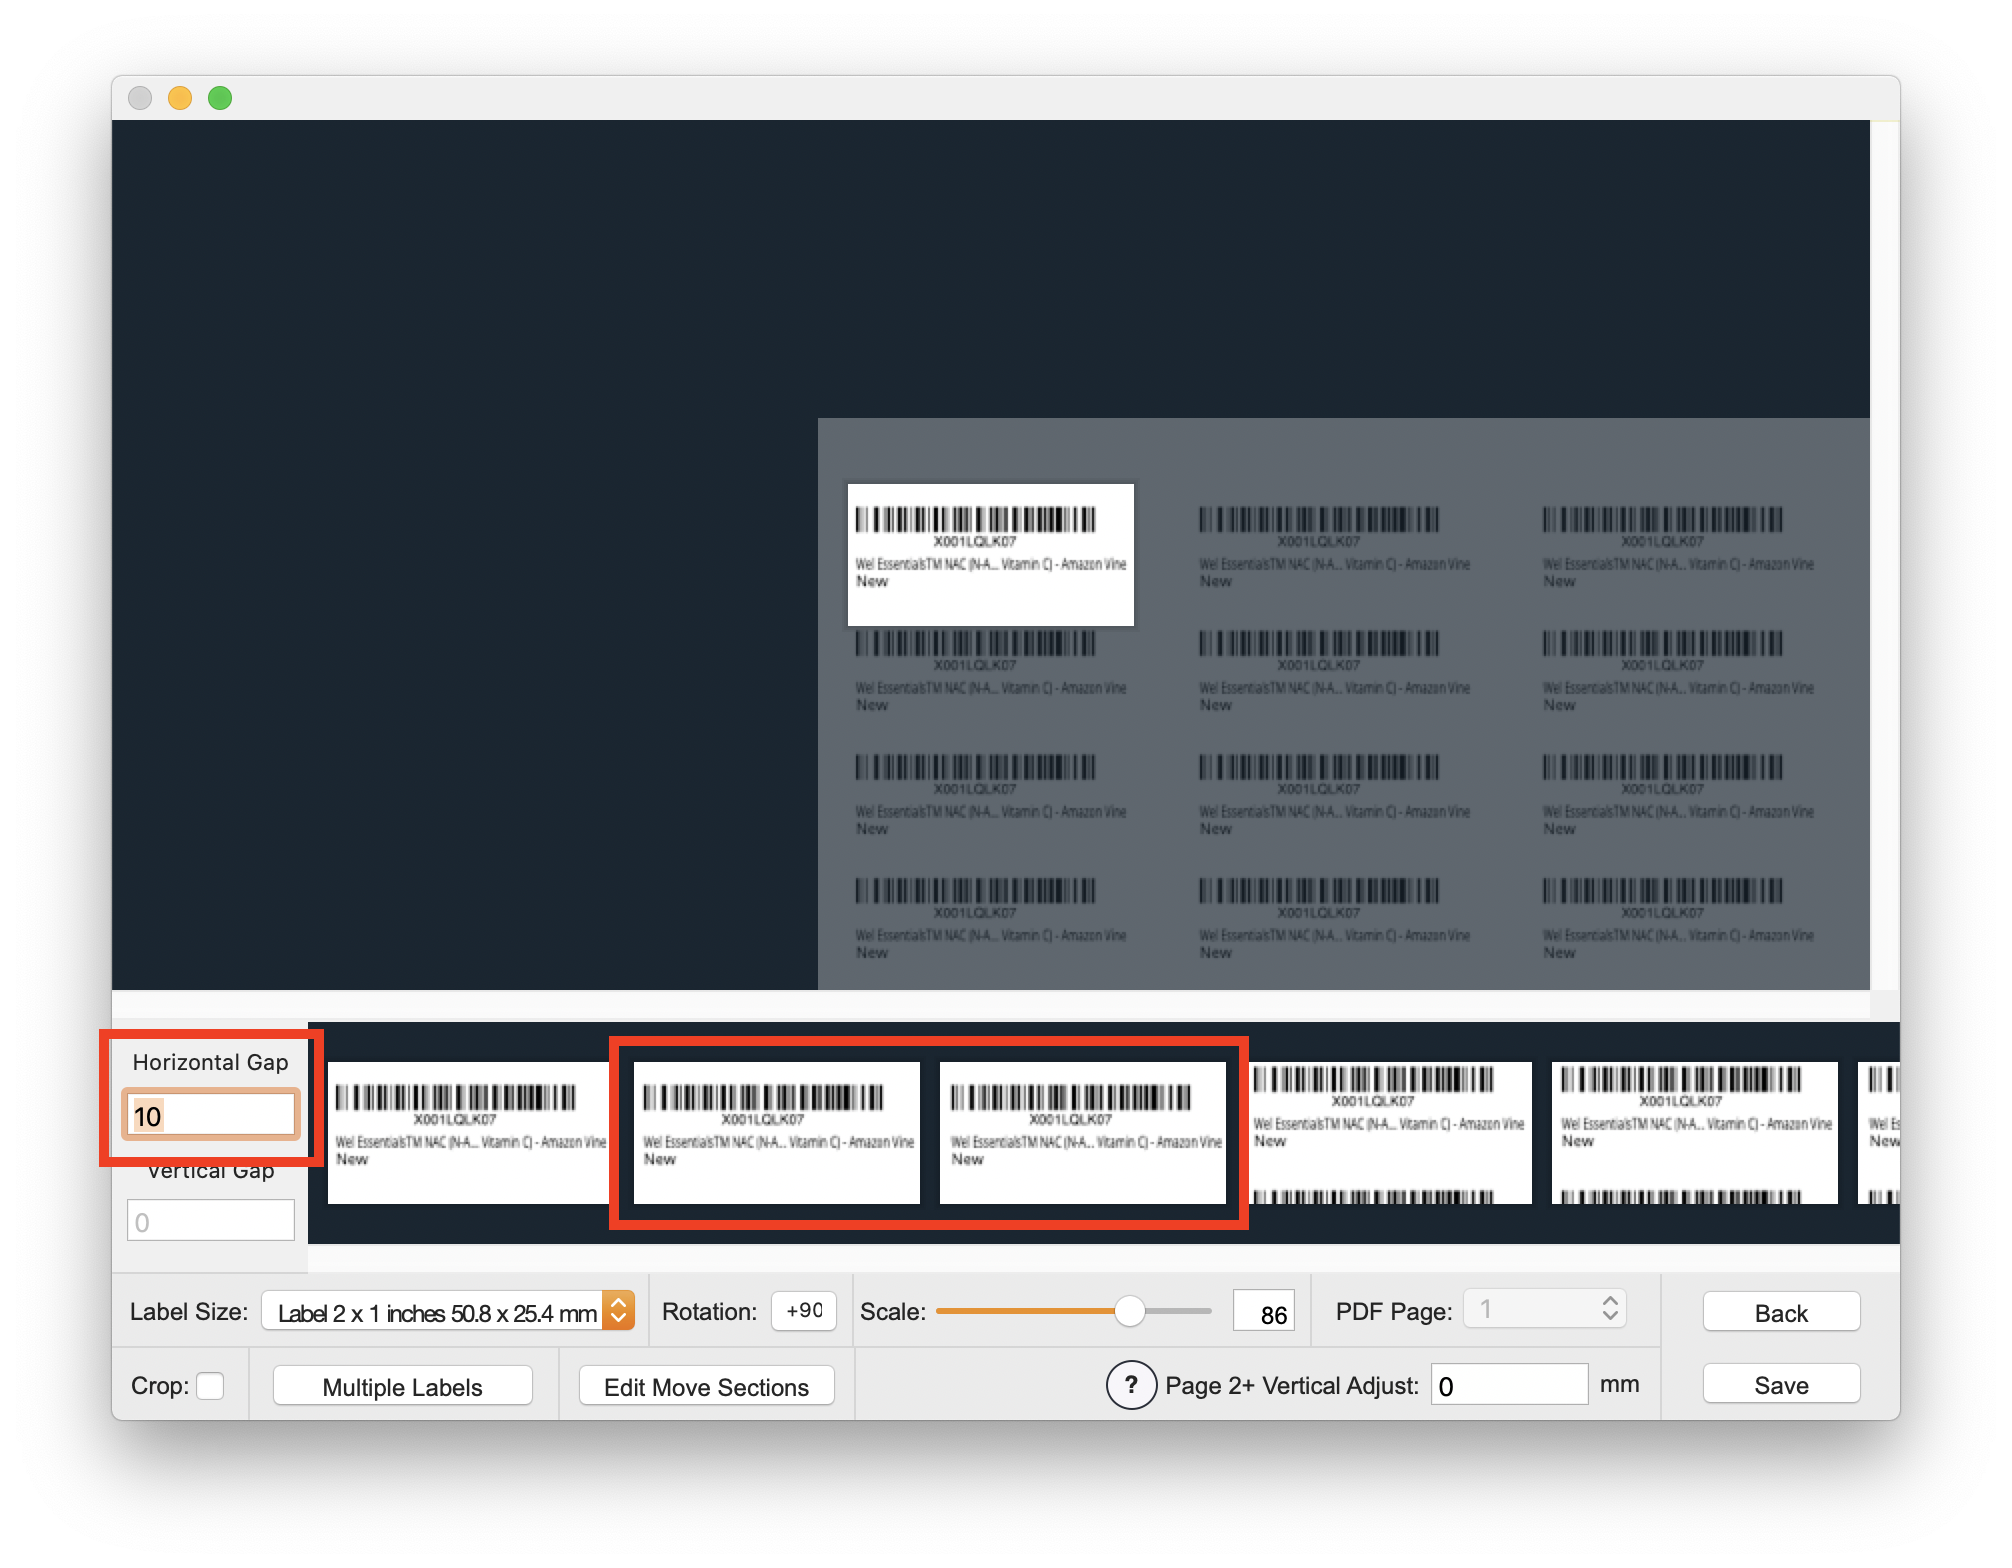 Set the horizontal gap to "10" and press the return key. You will see the FBA label in the preview shift across. If needed adjust this amount until the preview shows the first 3 labels in the correct place.
Set the horizontal gap to "10" and press the return key. You will see the FBA label in the preview shift across. If needed adjust this amount until the preview shows the first 3 labels in the correct place.
j)
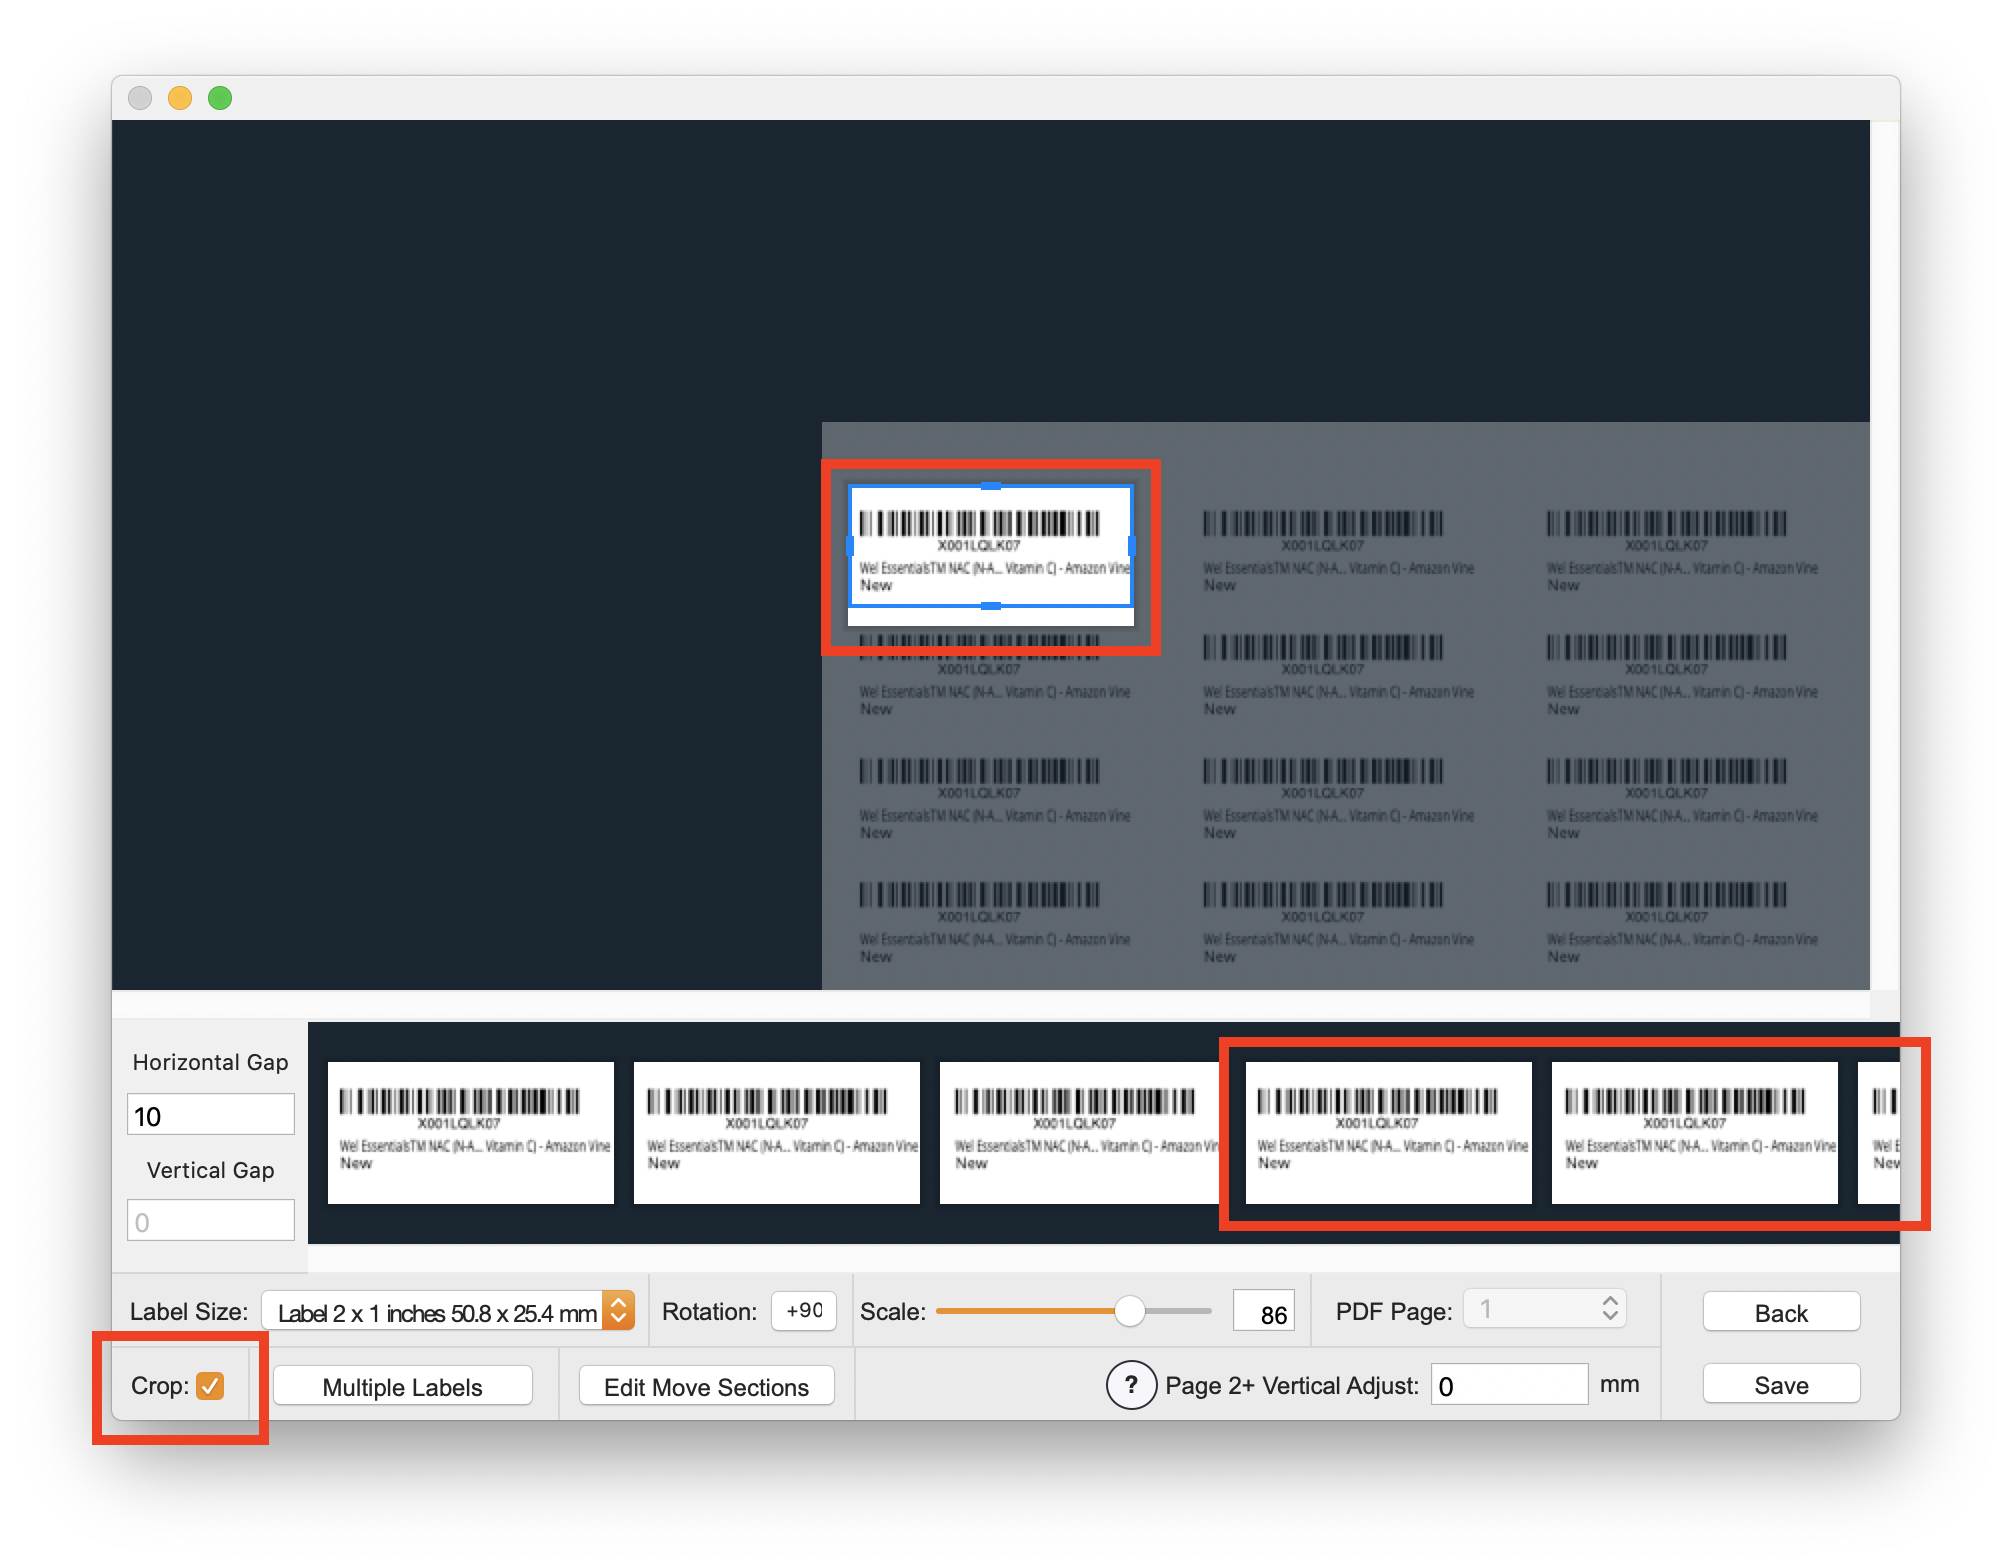 Turn on the crop option and drag the bottom crop handle up until the labels in the preview line up correctly. You can scroll the previews to see more by scrolling left/right on your mouse/trackpad.
Turn on the crop option and drag the bottom crop handle up until the labels in the preview line up correctly. You can scroll the previews to see more by scrolling left/right on your mouse/trackpad.
k)
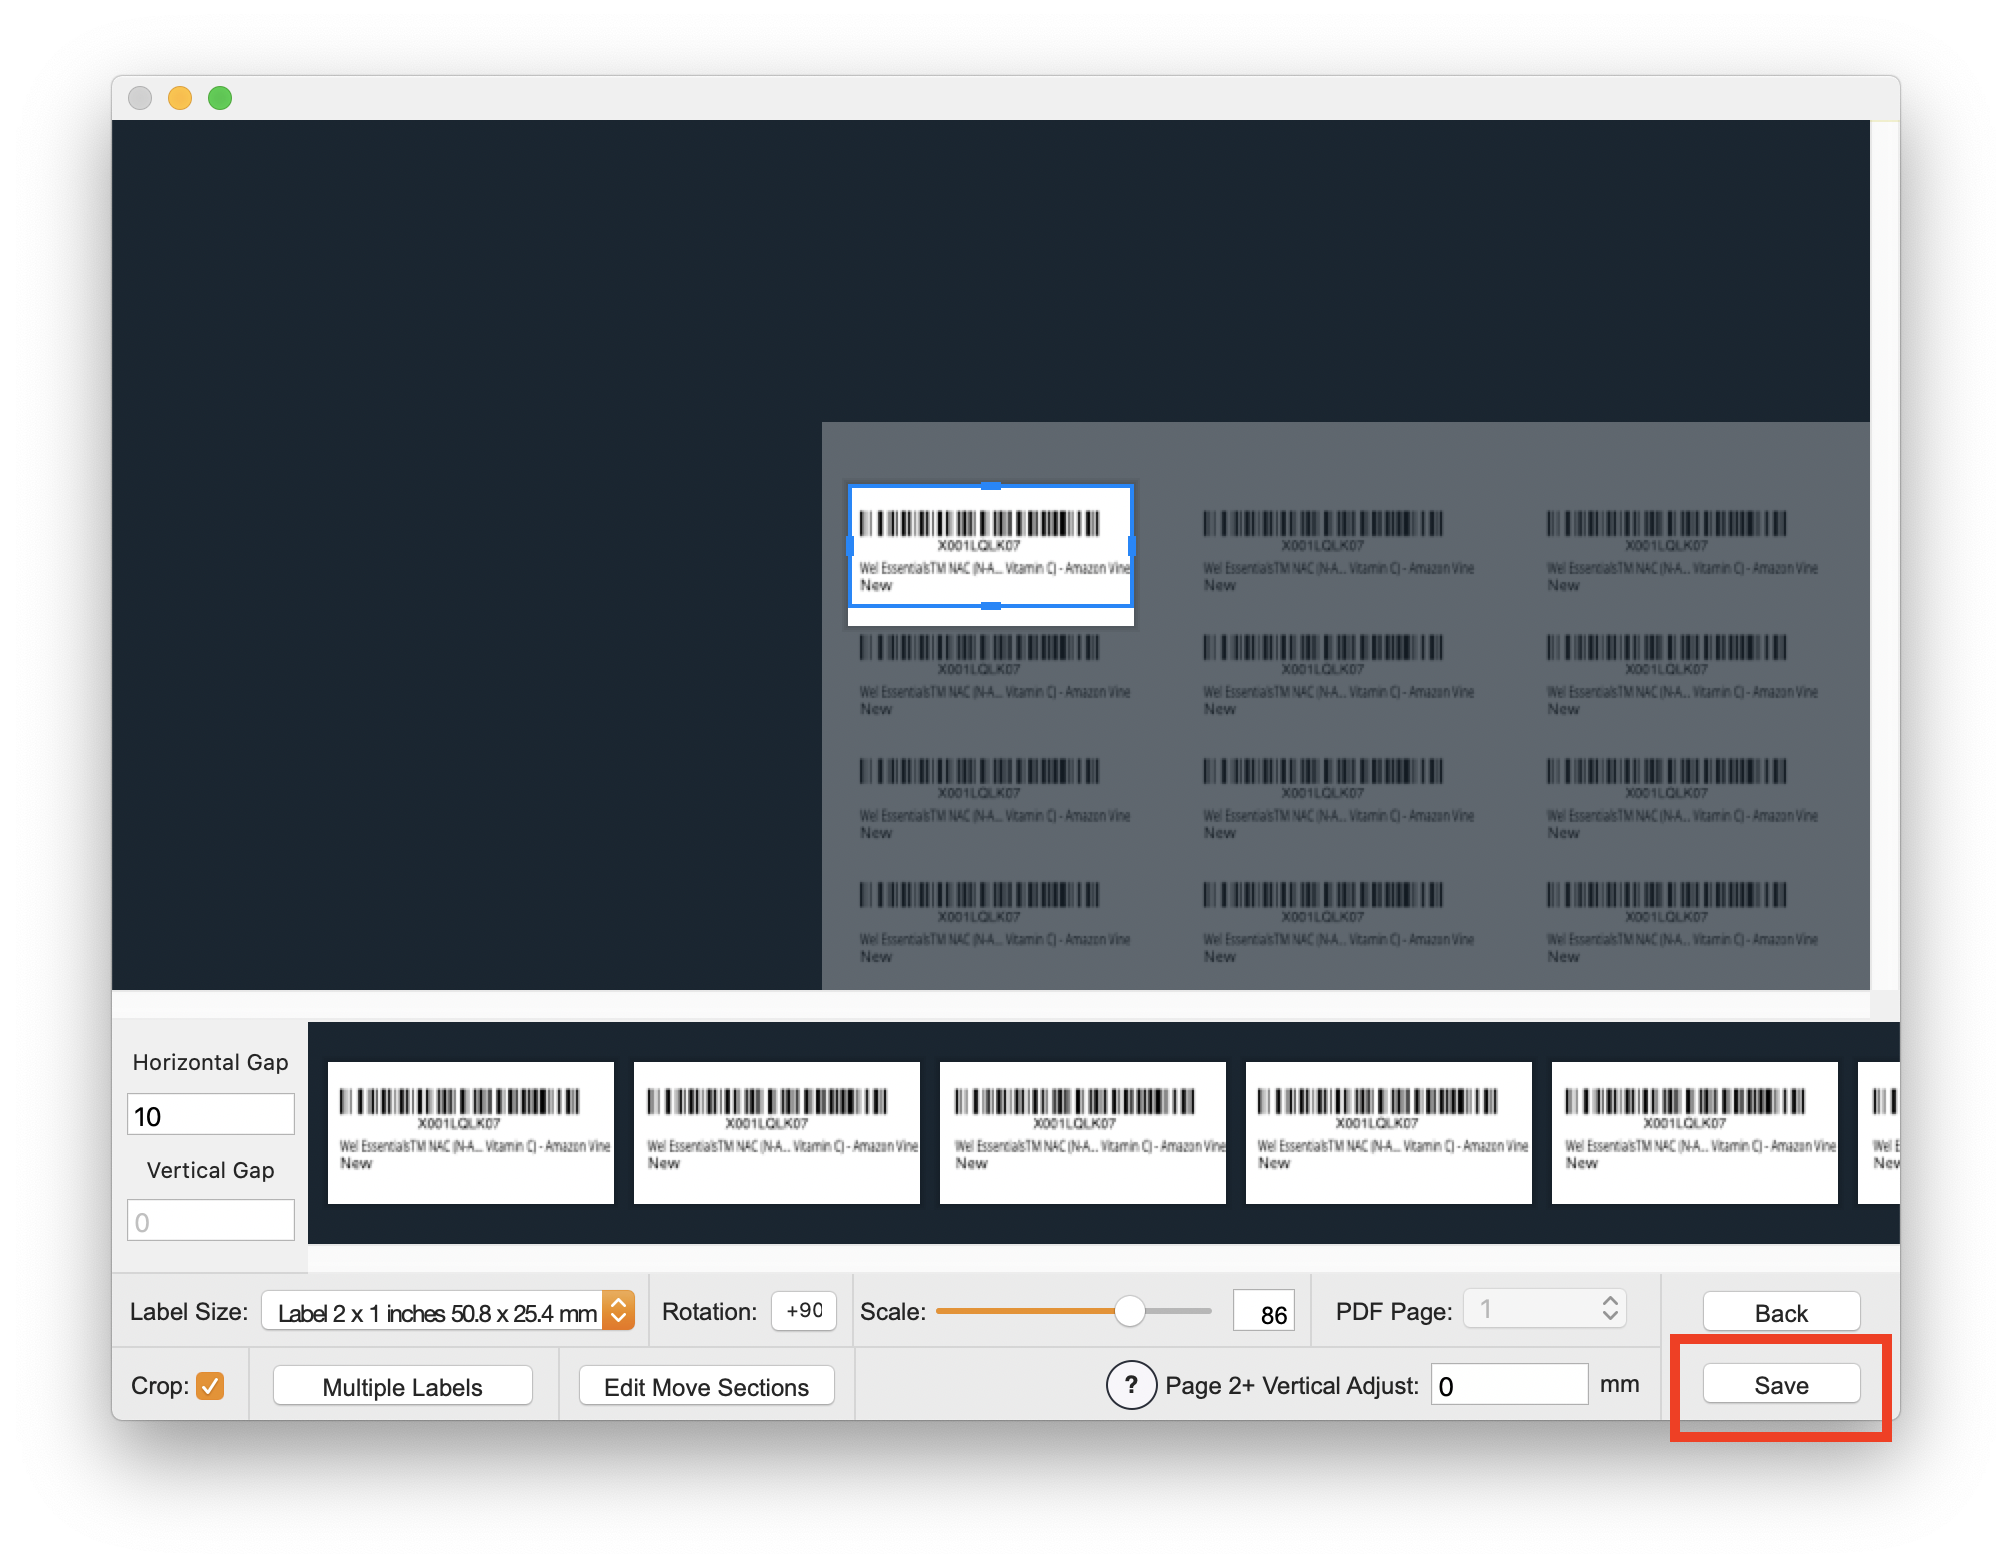 Click the "Save" button to save the settings.
Click the "Save" button to save the settings.
l)
 On the next screen enter a unique name for the printer with the Amazon FBA Items setup. Then follow the rest of the steps to complete the installation.
On the next screen enter a unique name for the printer with the Amazon FBA Items setup. Then follow the rest of the steps to complete the installation.
2. Print the labels
a)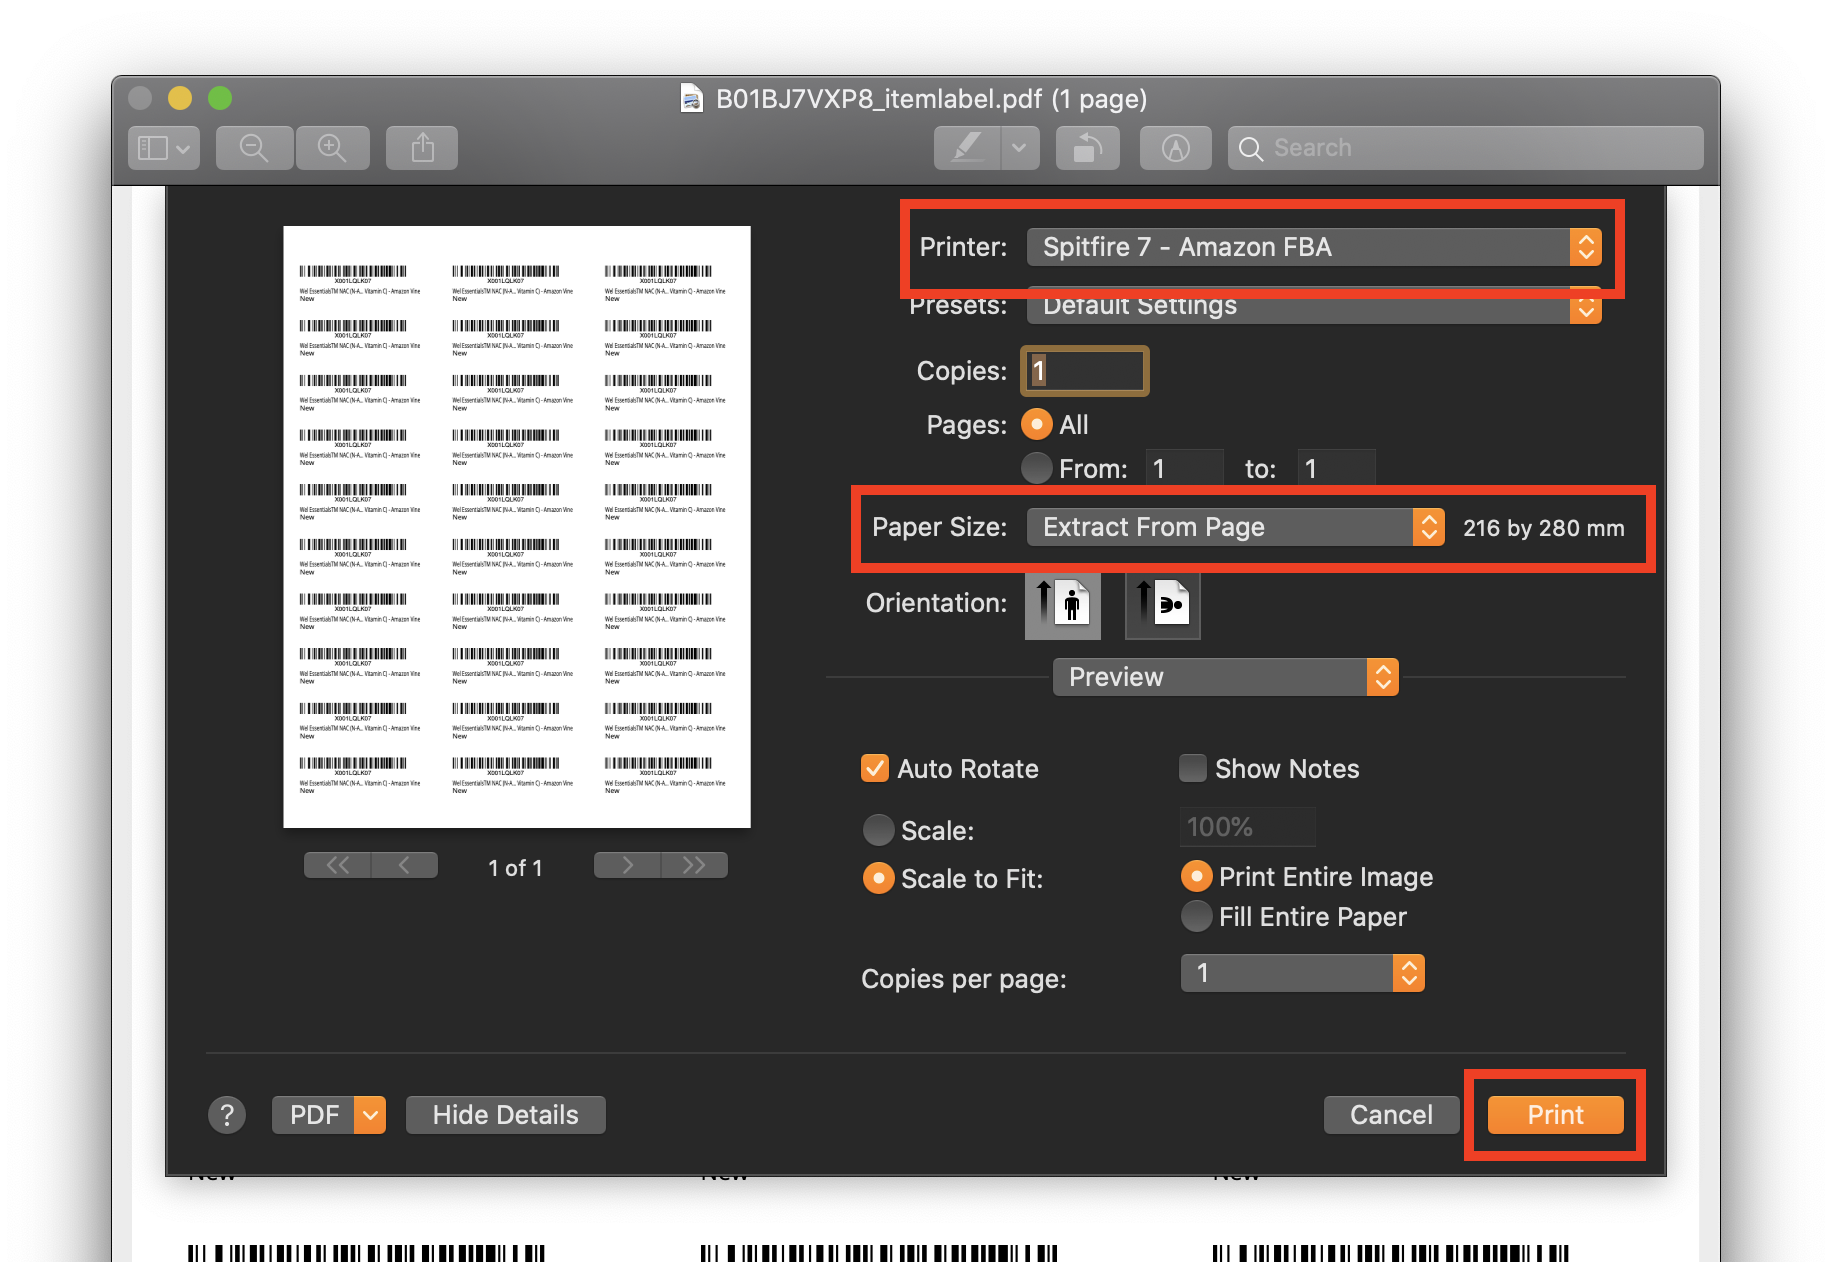 Open your label through the website or a PDF viewer, select the printer you just installed and choose "Extract From Page" as the paper size.
Click "Print".