Below you will find a tutorial teaching you how to access your windows printer on a mac
1. LDP print service
a)
First we need to Enable the LDP print service following the steps below.
b)
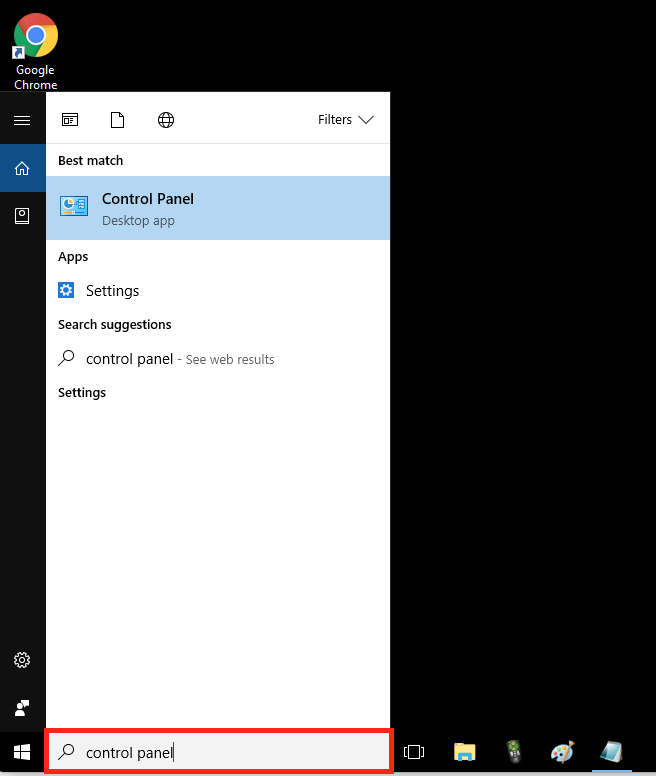
When you are on your Windows PC, click start and type Control Panel into the search box.
c)
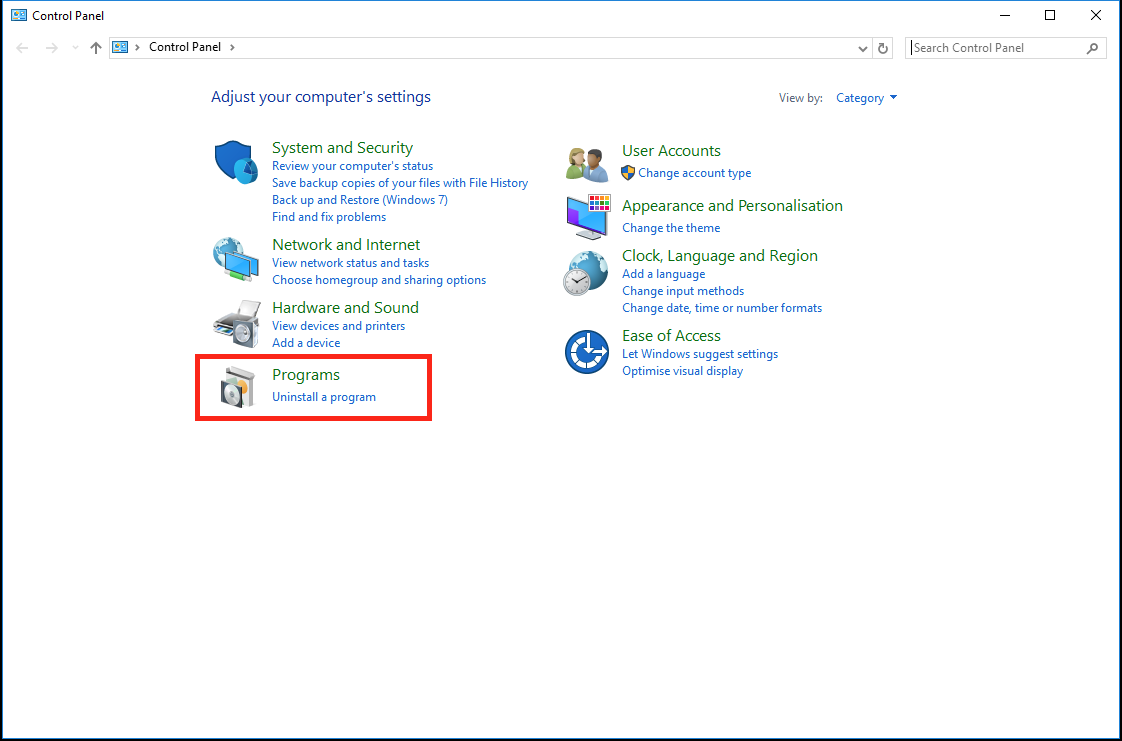
Your control panel should look similar to this.
When in the control panel you will need to click into "Programs".
d)
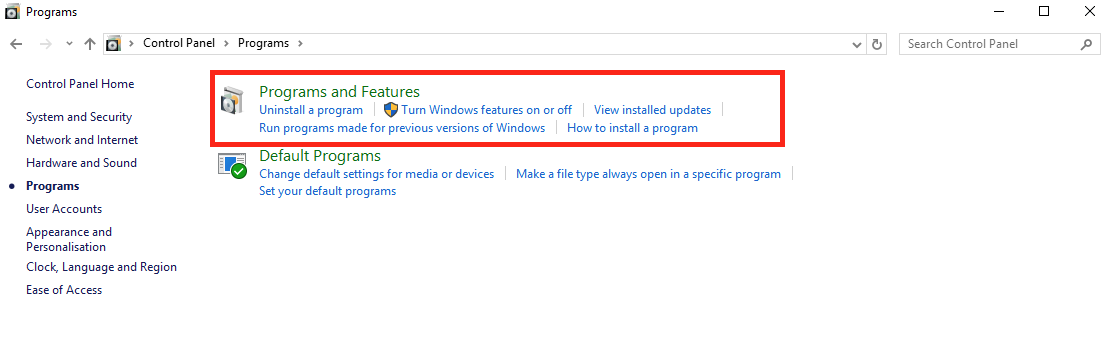
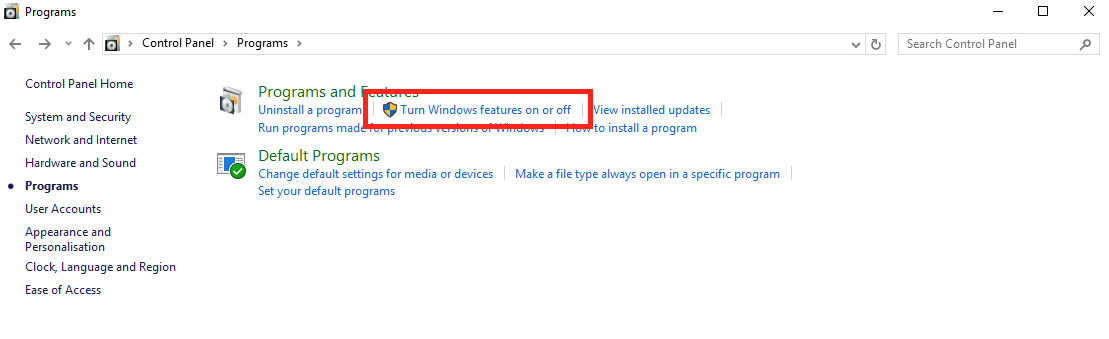
When you click into "programs" you will see a new window like in the image above.
From here we will be looking for "Programs and features".
e)
When you have located "Programs and features" click on the "Turn windows on or off" link.
f)
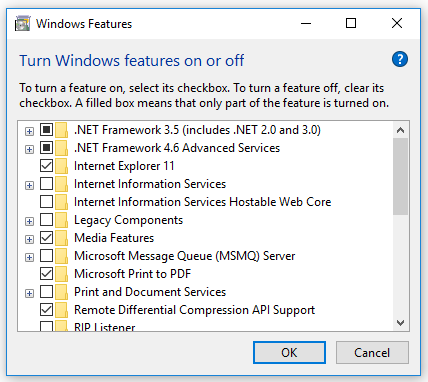
The above dialog will show after you click "turn windows link on or off".
g)
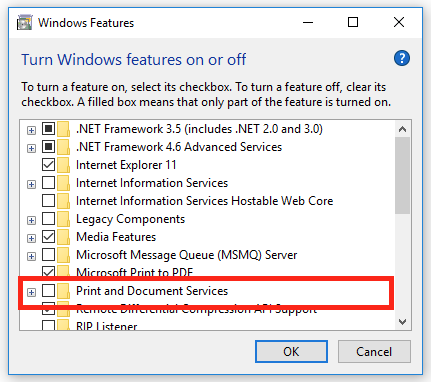
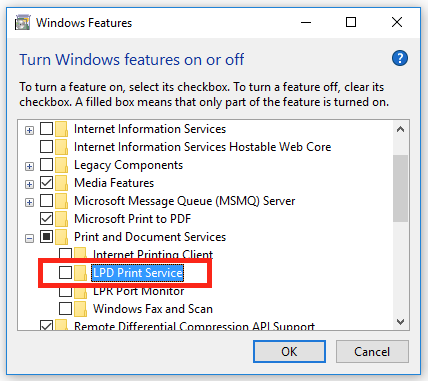
When your in the "turn windows link on or off" dialog locate "Print and document services".
We have annotated which file you need to find, there is a small "plus" icon at the left side of it.
Click that icon to expand it.
h)
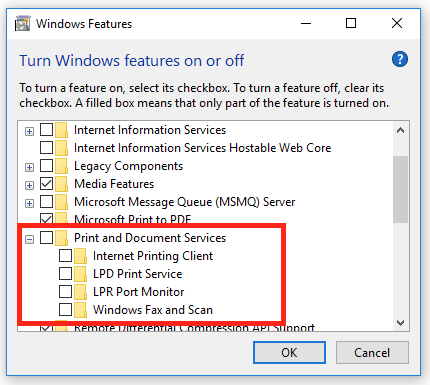
When you have expanded the file you will see other files.
It should look similar to the image above.
i)
Find LDP print service and check the box so its turned on.
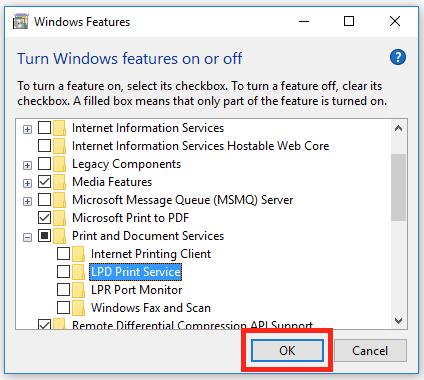
j)
Once you have ensured you have turned the correct features on click "OK"
2. Sharing the printer
a)
Next we have to share the windows printer on the network using the steps below.
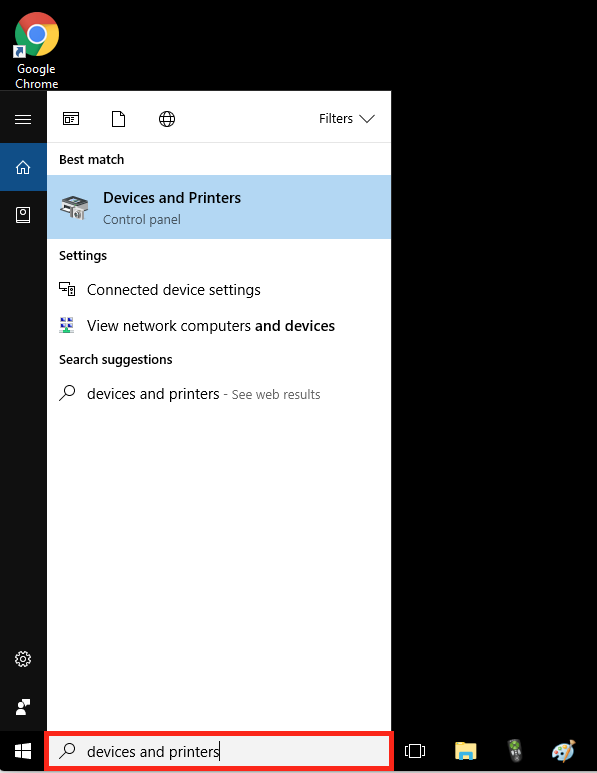
b)
Click start and type Devices and printers in the search text box.
Click onto the Devices and printers when it comes up under best match.
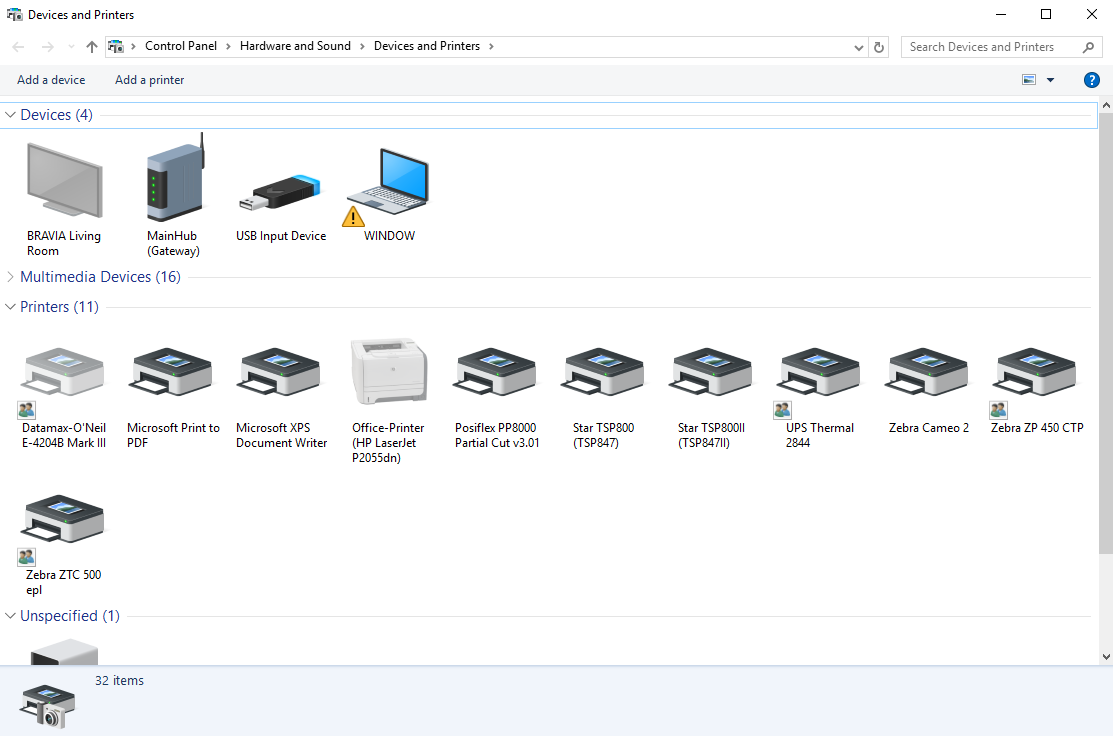
c)
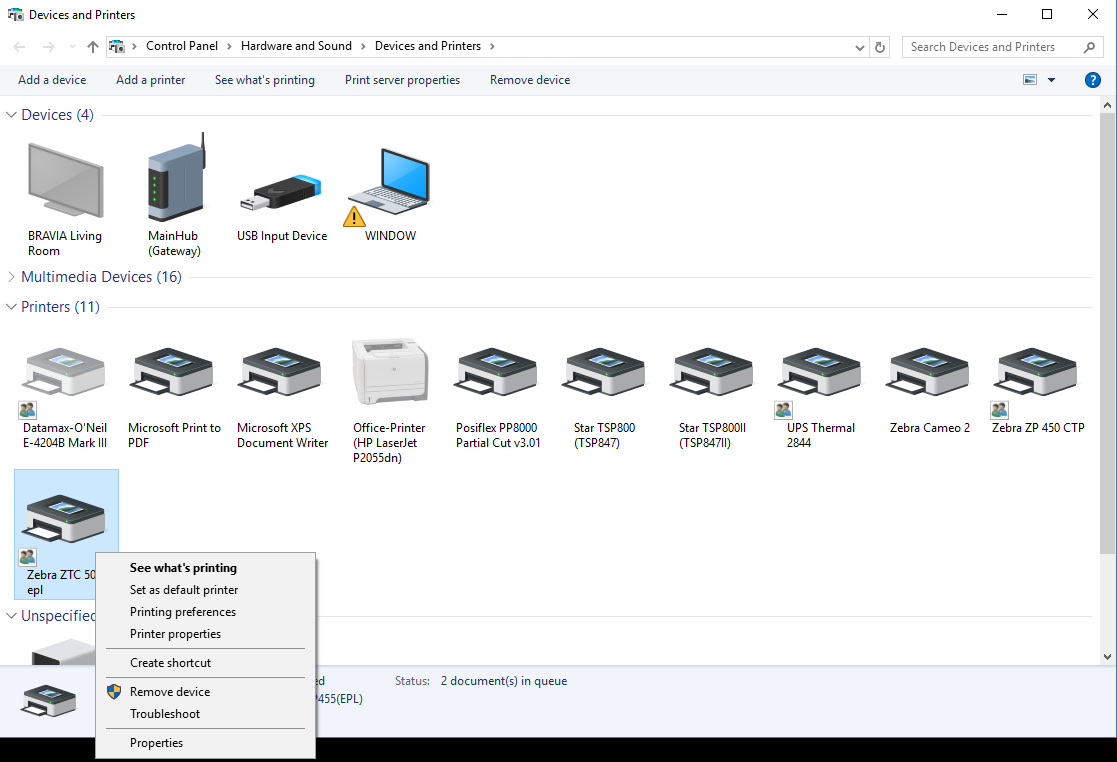
A new dialog will open up when you click into "Devices and printers", it should look like the image above.
d)
Find the printer you will be sharing and right click on it.
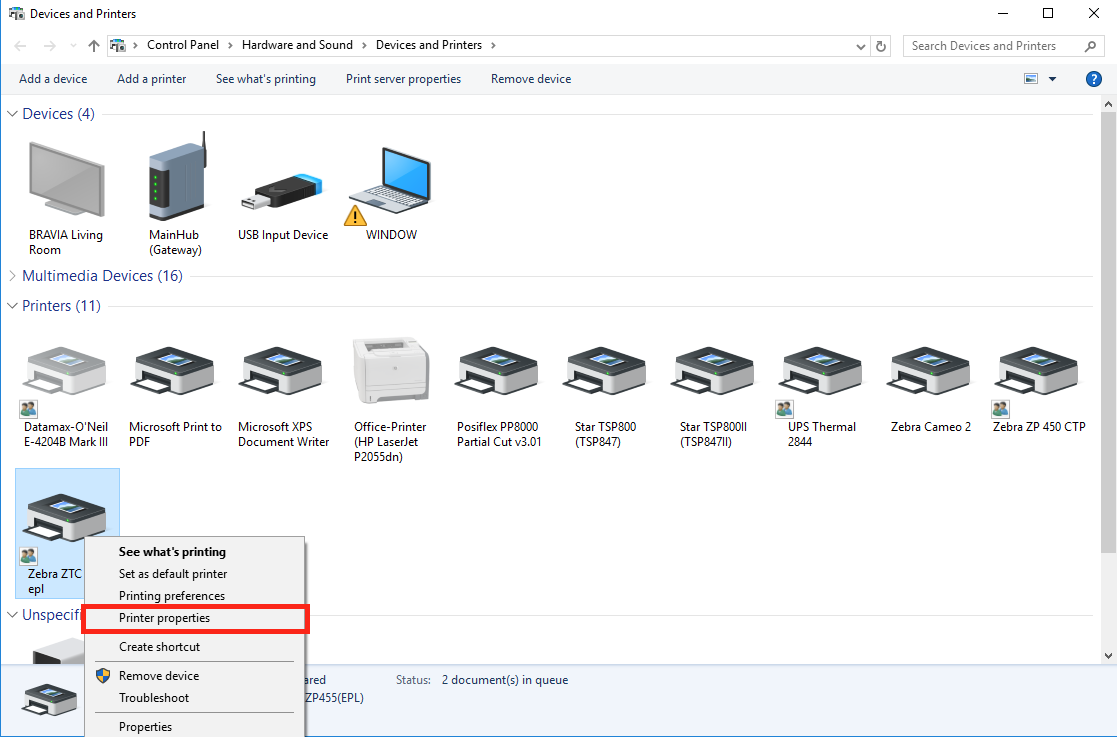
A small dialog will open up it should look like the image above.
e)
When you have right-clicked on the printer you are sharing, you need to select Printer properties from the menu.
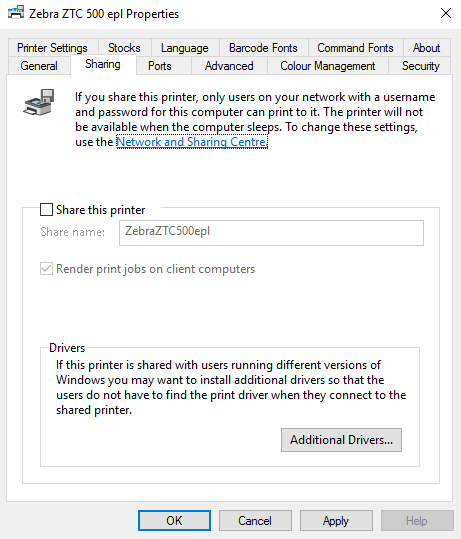
f)
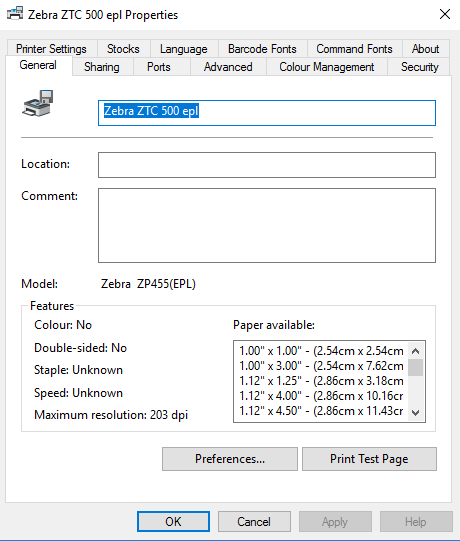
After clicking into Printer properties, a dialog will open like in the image above.
g)
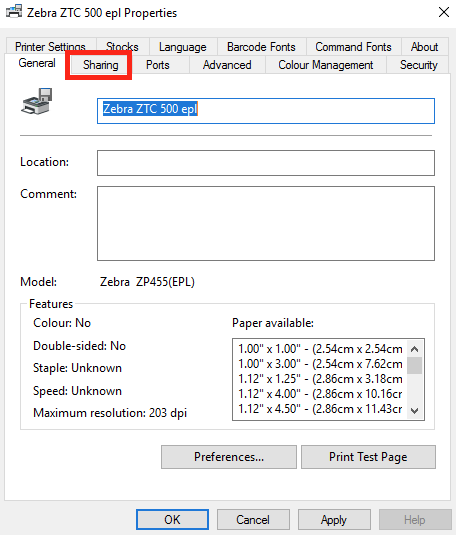
The next step is to find the sharing tab and click into it.
We have annotated the tab for you, so you can see where it is.
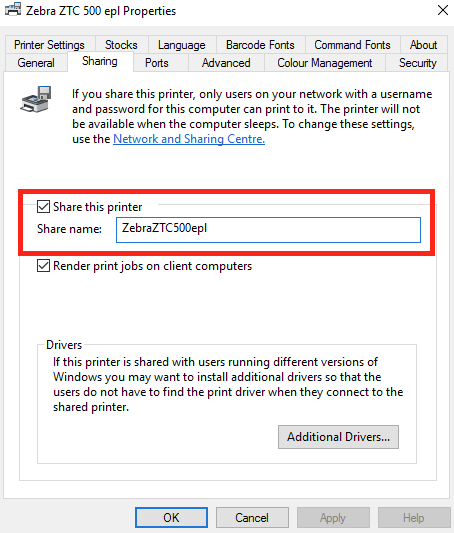
h)
After you have clicked into the sharing tab, your dialog should look like the one in the image above.
i)
Next check the Share printer box so that you can share the printer.
You can also give the printer you are sharing a specific name, in the first text box below.
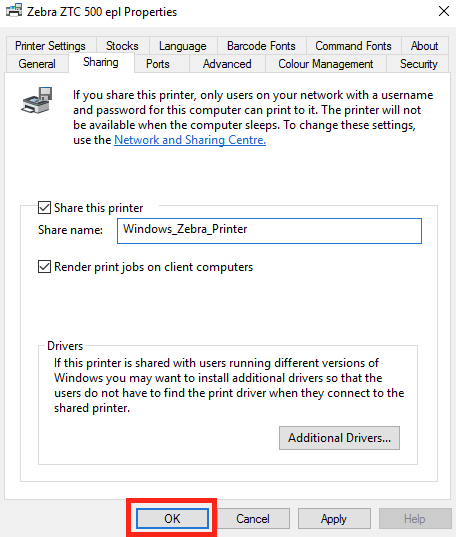
Note: when you write a share name use no spaces.
For example: Windows_Zebra_Printer
j)
After you have ensured you have checked the share printer box. Click OK.
3. Finding your Windows PC's IP address
a)
Before going on your Apple Mac you need to find your Windows PC's IP address.
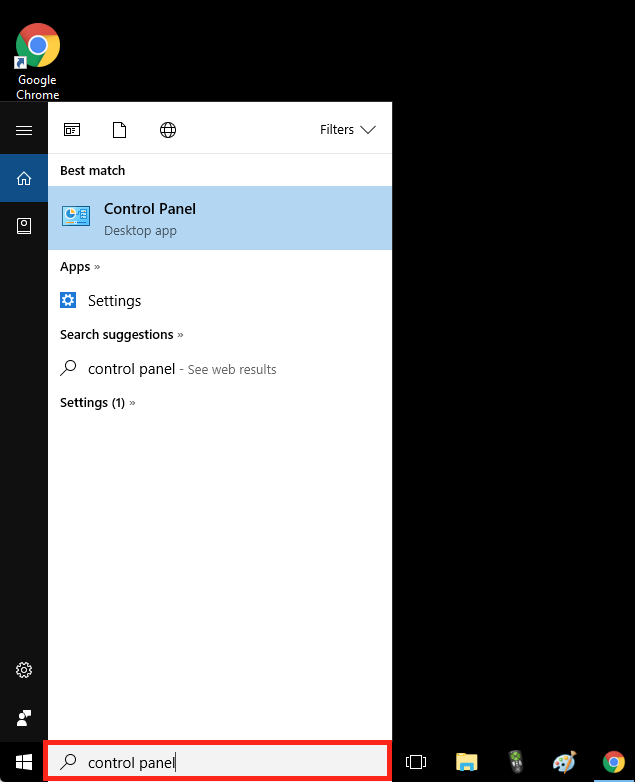
b)
To Find your PC's IP address begin by clicking start and typing control panel into the search box.
Click into the control panel from the list.
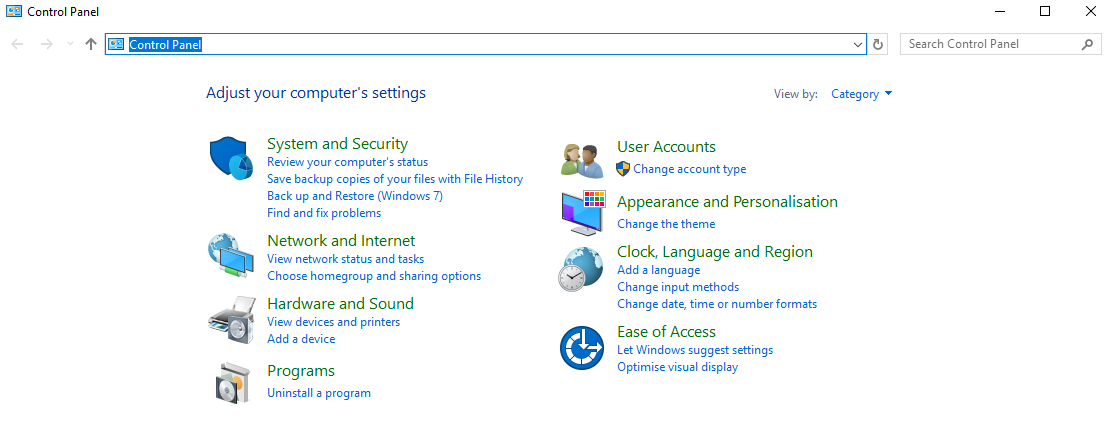
c)
After clicking into control panel a new dialog will open this will be the control panel.
Your dialog should look like the image above.
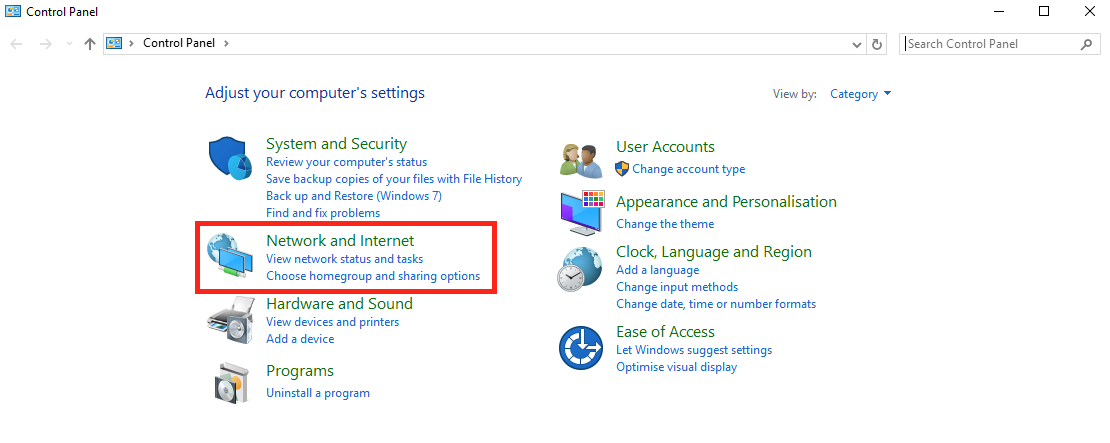
d)
Once you are in the control panel You will need to find the Network and Internet section.
once you have located this, you will need to click into view network status and tasks.
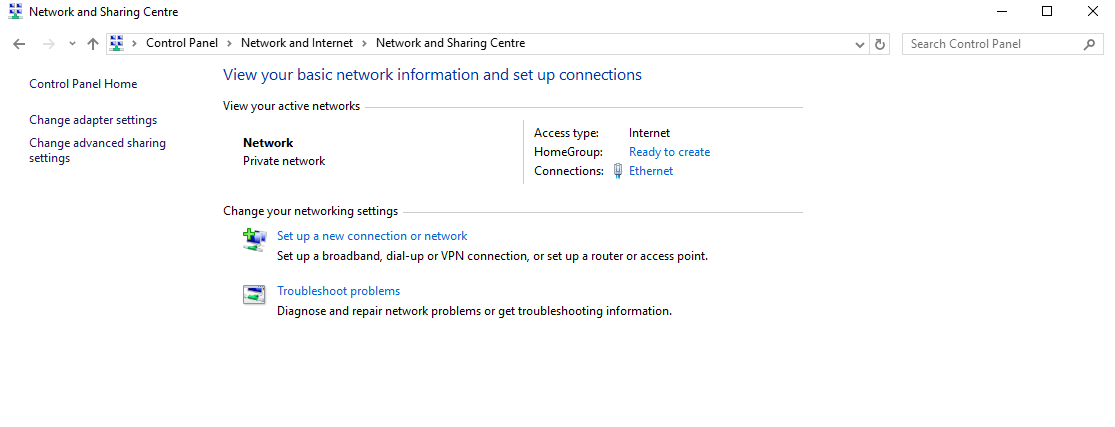
e)
A new dialog will show when you click into view network status and tasks.
It should look like the image above.
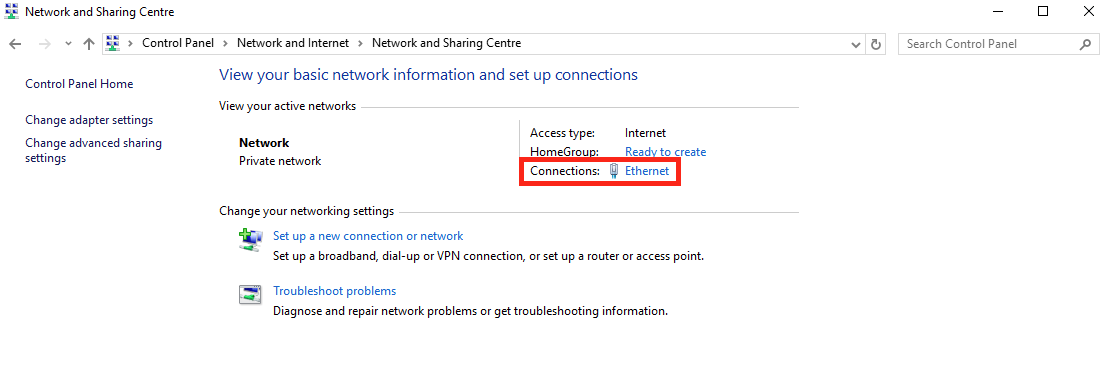
f)
Next locate the connections option and select Ethernet or Wifi depending on how your PC is connected to the network.
We have annotated the image above showing you were you need to select.
g)
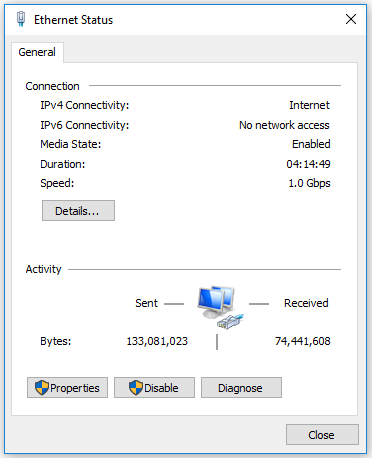
After selecting your connection type whether it was Ethernet or WiFi a new dialog will open.
It should look like the dialog in the image above.
h)
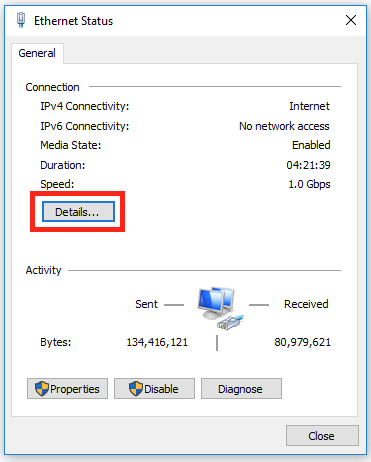
To find your IP address click into details.
i)
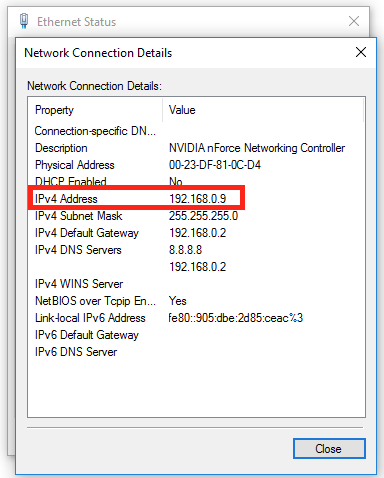
Note down your IPv4 address then you can click close.
You have now finished everything you need to do on your windows PC
4. On the Apple Mac
a)
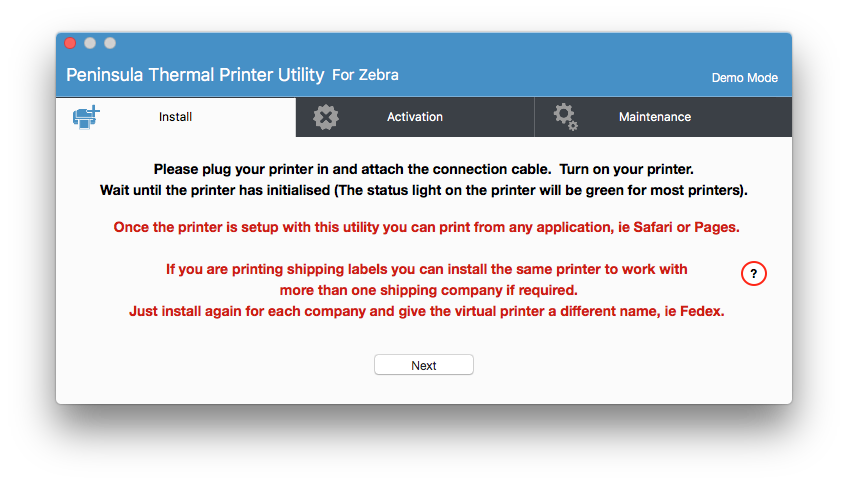
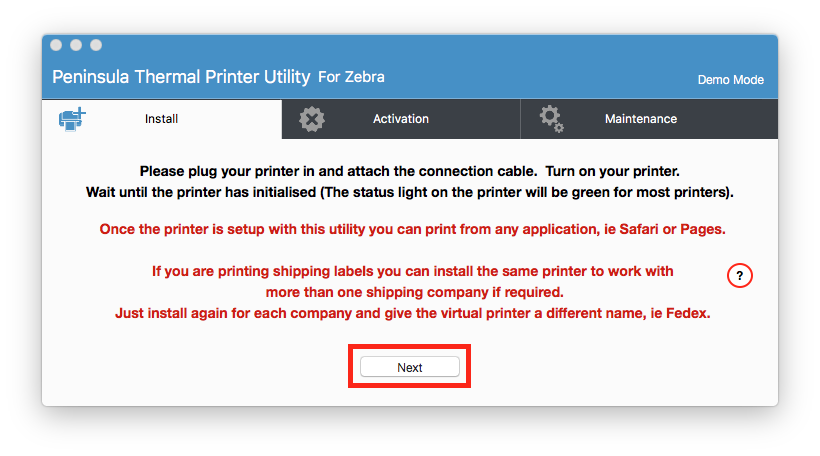
Begin by opening up the Peninsula Thermal utility.
Enter your Admin username and password when prompted.
b)
Click next to begin installing your shared printer.
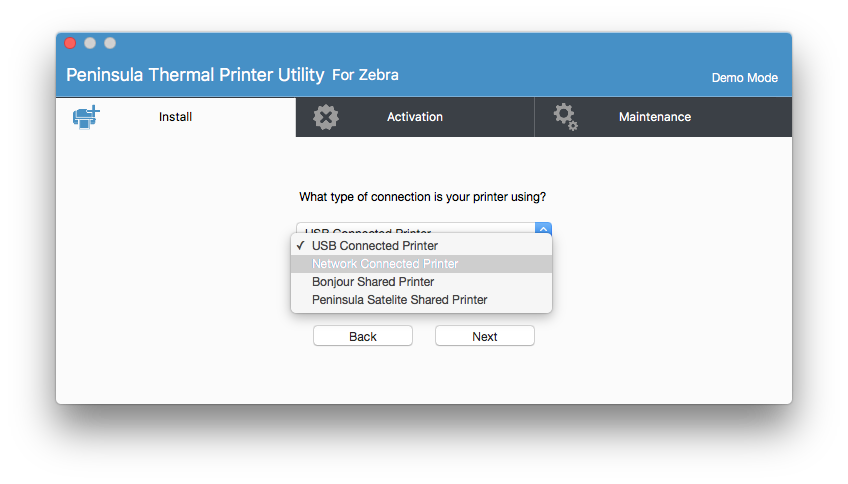
c)
Next click into the drop-down menu and select netowrk connected printer.
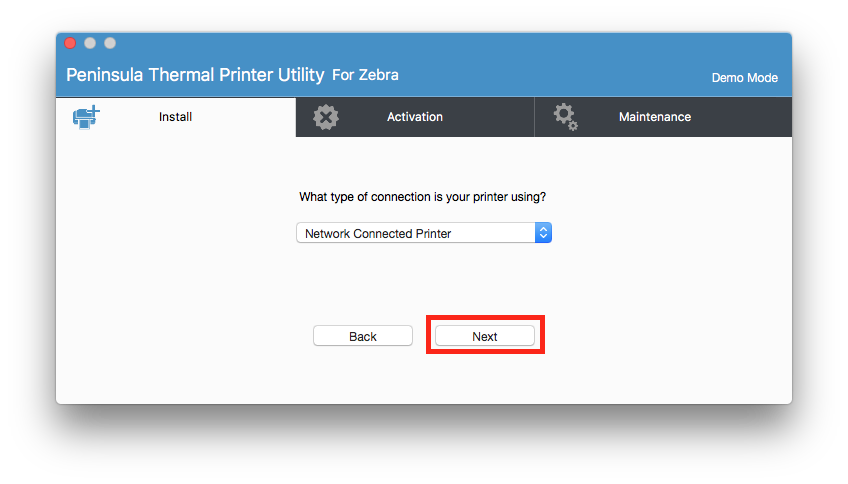
d)
Ensure you have selected network connected printer and click next.
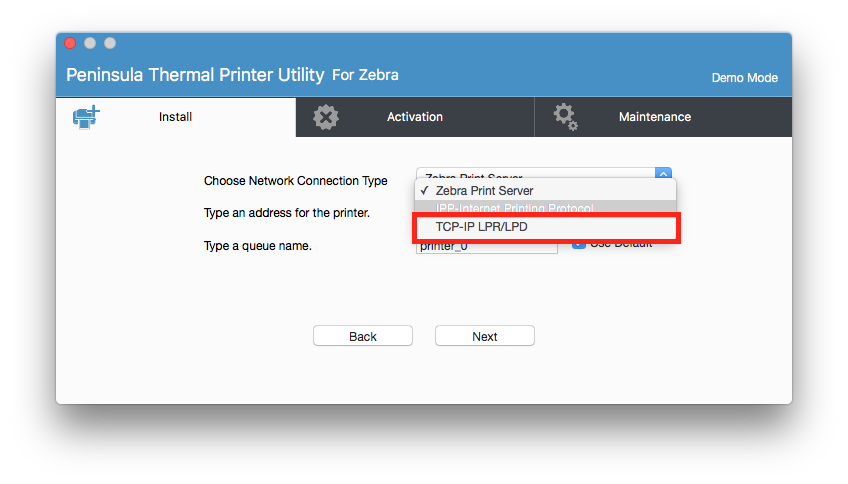
e)
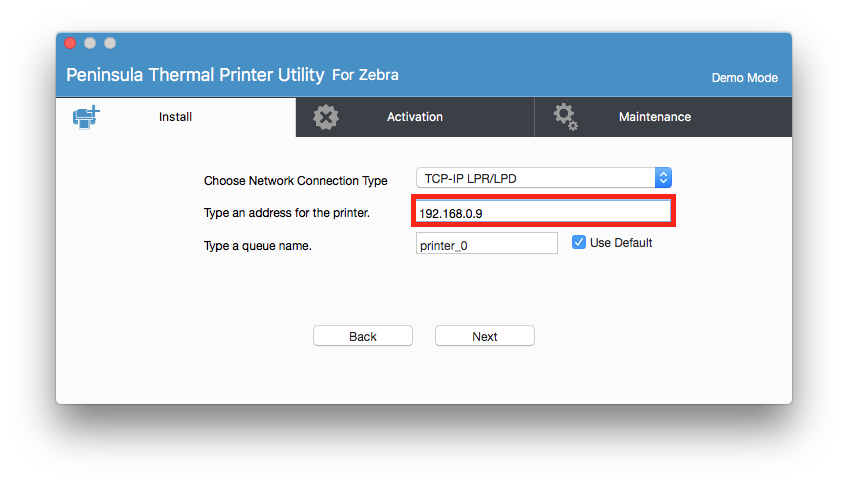
The next step is to choose the network connection type, select TCP-IP LPR/LPD from the drop-down menu.
f)
We then need to take that IPv4 address that we jotted down earlier
and enter it into the second text box down.
g)
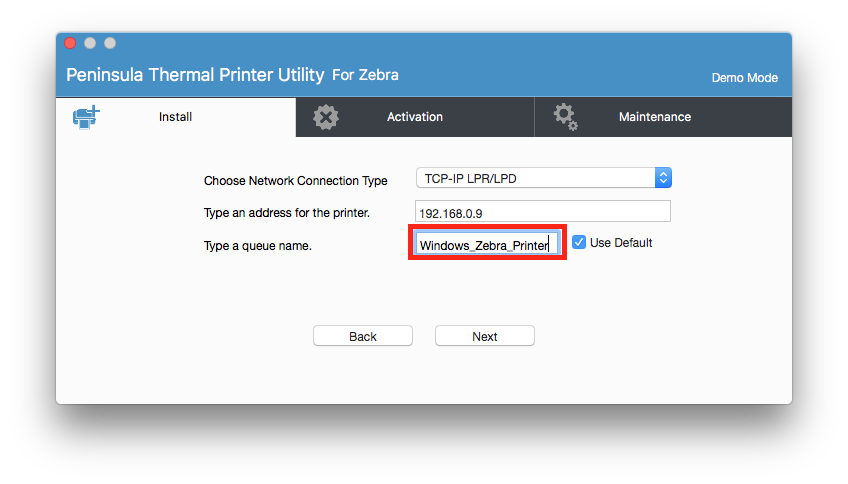
Next we have to enter in the sharing name for the printer that we set earlier.
h)
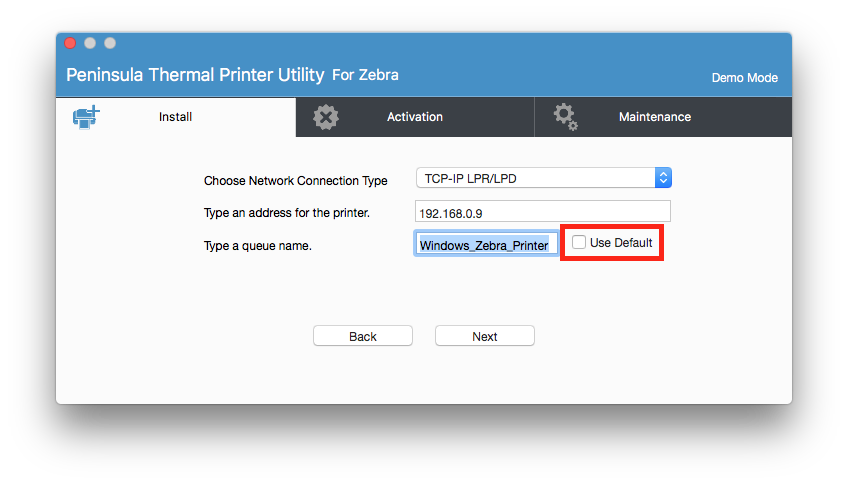
Ensure Use default is not clicked.
i)
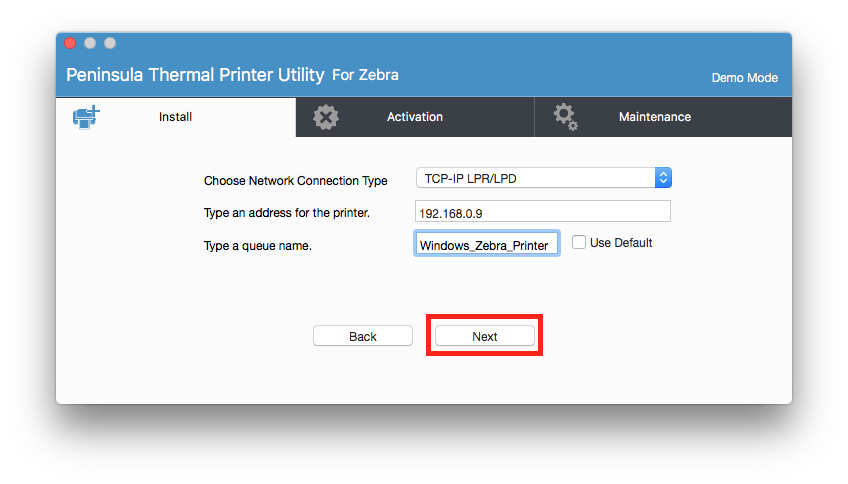
Click next to go onto the next step.
Then follow the rest of the setup like usual.
If you need help to setup a network connected printer we have a support page for that.
If you still encounter any issues, please email our Technical Support at
tech@peninsula-group.com